
DIY: Laundry Room Progress…we have horizontal paneling!
The Laundry Mud Room Revamp is in full swing! And I am thrilled to report that after a few busy days… well, busy for my husband Aaron and my father-in-law (FIL) at least… we now have horizontal paneling. Stage one complete! Quick flashback to what the room looked like on Friday afternoon:
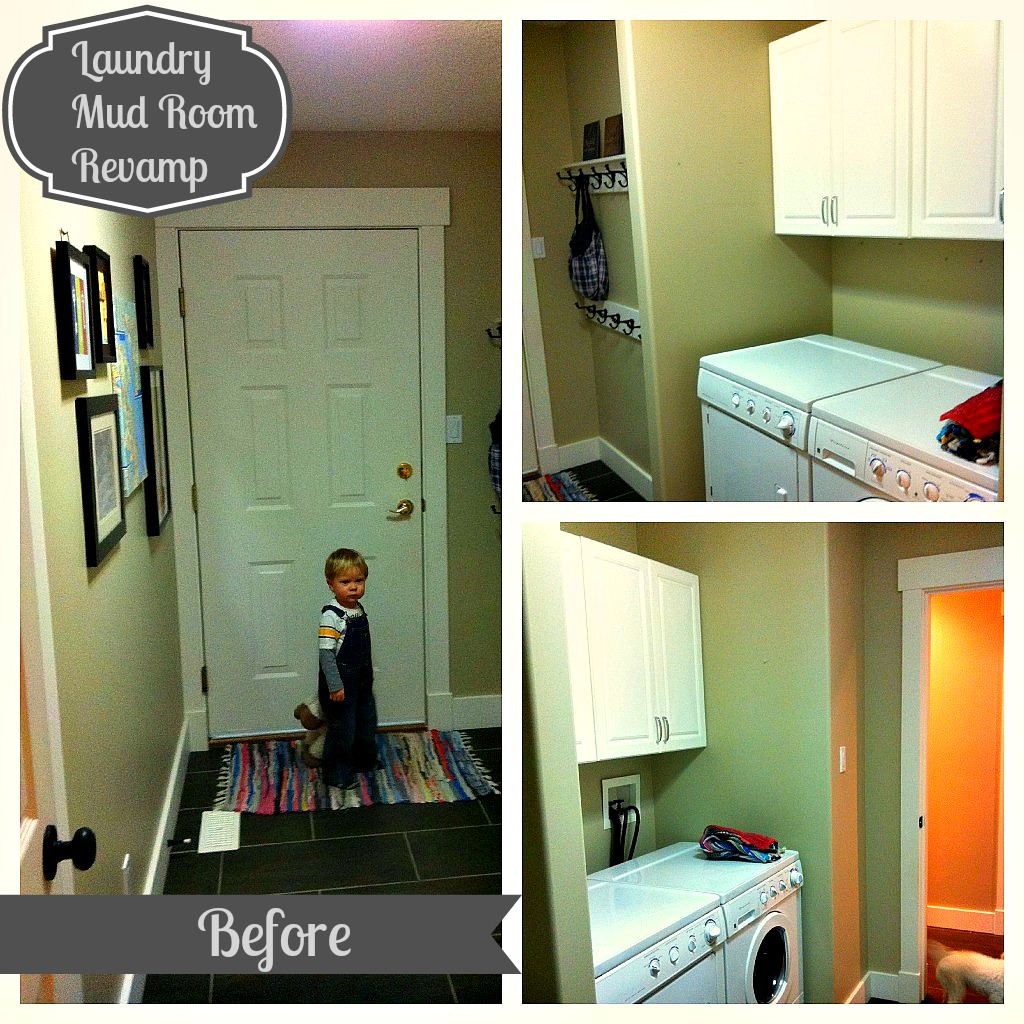
The toddler is a recent decorative addition to the room; I was trying to give it a little more “life” and “energy”. Two year olds are great for that.
And here is what the room looks like now, after two and a half days (about 9-10 hours of two men working on it):
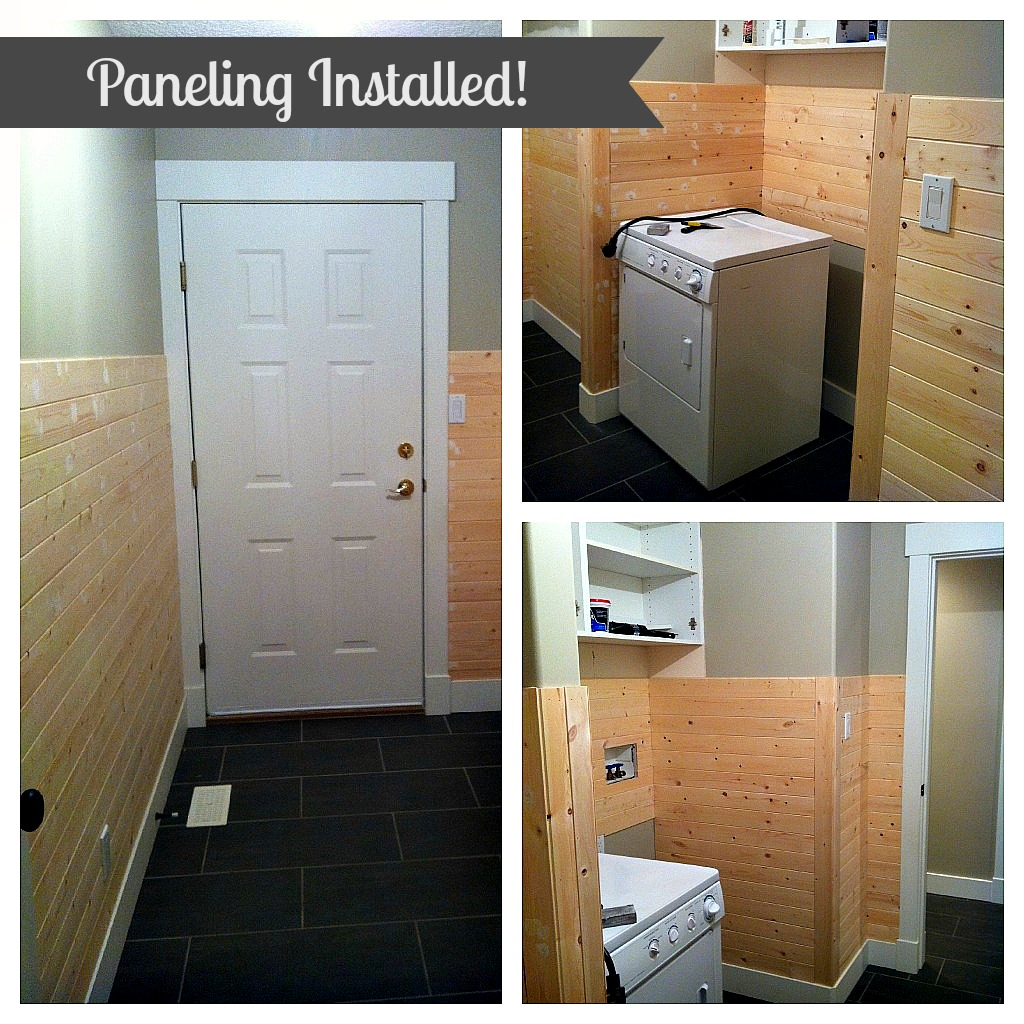
In all seriousness, we began the project Friday evening when we invited my in-laws for dinner in exchange for a small favour: “could they come and help us move the wall cabinet up?”. We wanted it at ceiling height so that we could put an open shelf below it. It seemed like a simple enough job, so Aaron and my FIL got started on the cabinet right before dinner. An hour and a half later they emerged, soaked in sweat and drywall dust, and nearly too exhausted to eat. Perhaps a slight overstatement, but it did take quite a bit more time and energy then we expected. They had to carve some of the drywall out near the ceiling in order to accomodate the cabinet as the walls (obviously) weren’t quite ‘plum’. Alas, eventually there was success! Yay!
Aaron filled and sanded all the holes in the paneling last night but we still need to DAP the corners and add the top trim board to finish the paneling off. I will write a more in-depth tutorial about HOW TO install this type of paneling soon, once we finish off the trim board etc., but for now here is a quick pictoral recap of what we used:
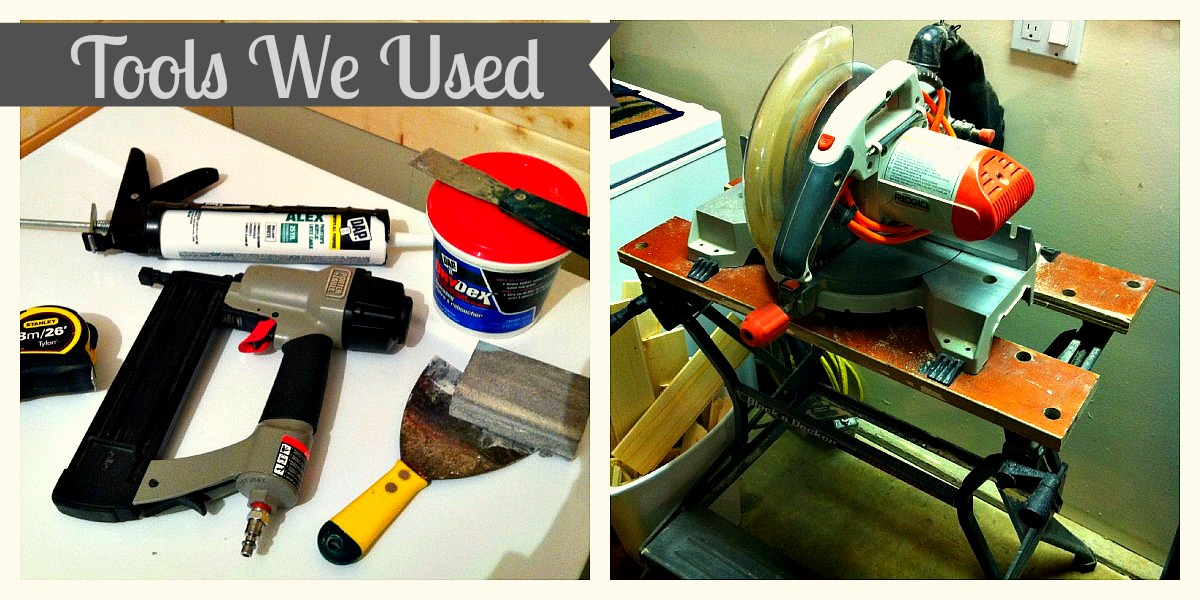
You will need the following tools (or something closely resembling them):
- Measuring tape
- Brad nailer
- Caulking gun and caulk
- Wood filler (or sub in drywall filler like we did)
- Putty knives
- Sanding block
- Chop saw
The paneling we chose was:
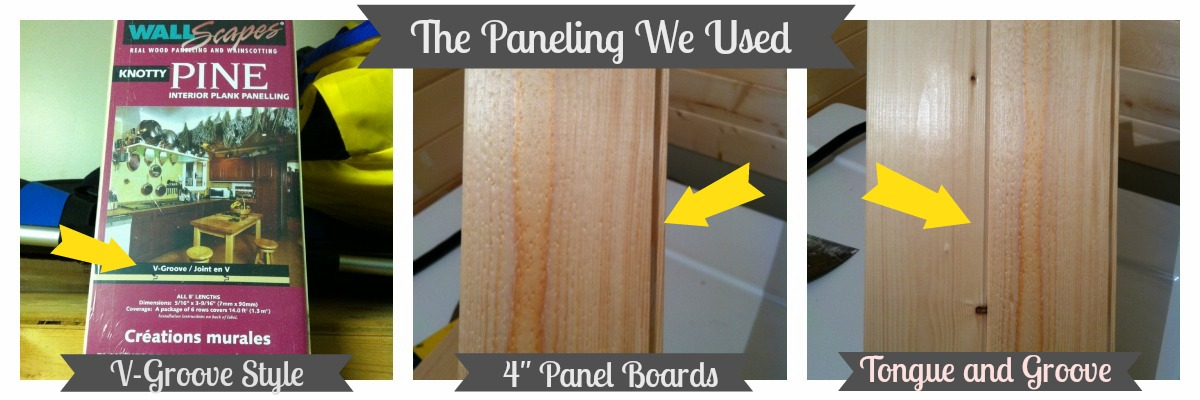
We wanted to use paneling like you would see in an old lake cottage and I think we got the ‘right stuff’! I CAN’T WAIT to see it all painted out white! I can hear the angels singing when I picture it:)
For now, there is a lot more on the list:
clear out laundry roommove wall cabinet up to ceilinginstall panelingfill and sand all holes- DAP paneling
- Install finishing top trim boards on paneling
- prime and paint paneling
fill, sand, prep upper walls- paint base coat on upper walls
- paint stencil on upper walls
- paint cabinet doors, countertop and shelf using DIY chalk paint
- install countertop, shelf
- reinstall cabinet doors
purchase new knobs for cabinet doorsorder fabric for curtain- make curtain for below countertop
- find and purchase new light fixture (my original idea of moving the dining room fixture has been overridden)
- rework, DIY, purchase, and “install” accessories (the good part!)
Lots on that list but I will keep you up to date:) In the meantime, I undertook a major revamp project myself this weekend and I will post about it soon. Little hint: it involves something that rhymes with “bantry”.
And remember, my housie friends, HOME wasn’t built in a day. Enjoy the journey!


i’am curious on how you cut the angles for the inside corners