
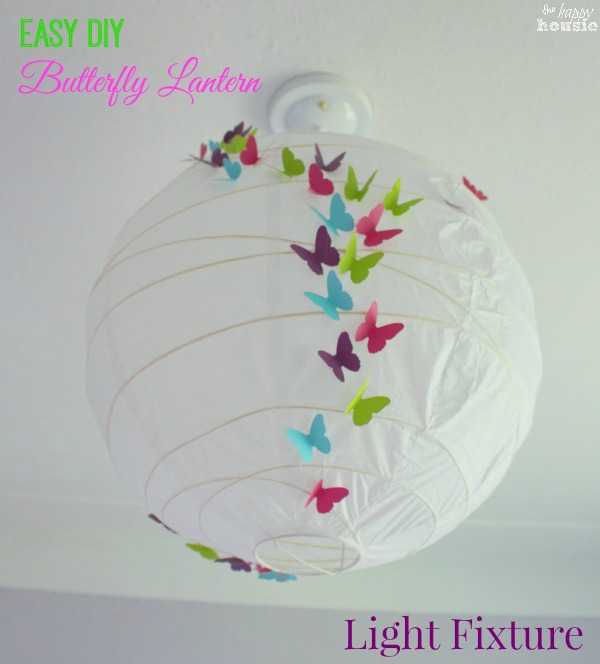
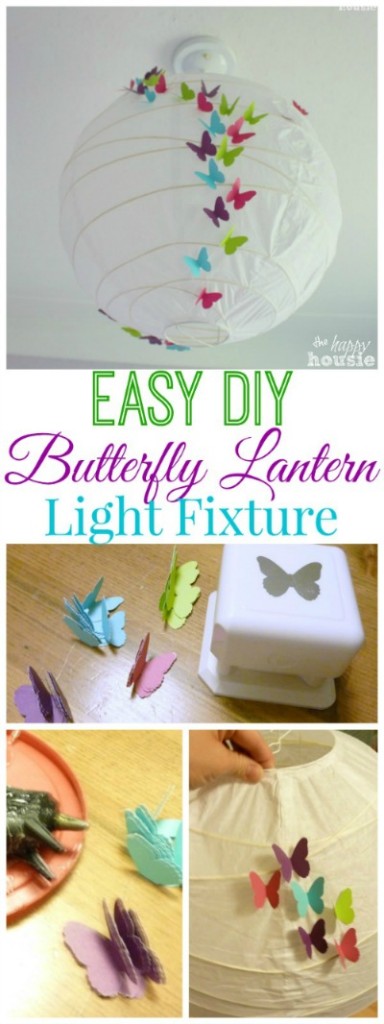
Easy DIY Butterfly Lantern Light Fixture
This sweet butterfly lantern decorating project was very easy, and budget friendly!
Today’s project is a special one to me because I made it for my friend’s daughter’s bedroom as part of a whole bedroom revamp we did for her a little while ago.
I honestly love it when my friends (and family) ask me to help them out with decorating projects, and this friend in particular really handed the reigns over to me for the whole space.
We were working with a specific budget, of course, but I love finding creative ways to make a space adorable without spending a fortune.
And this DIY Butterfly Lantern light fixture is the perfect example of a thrifty and adorable project.
Back before we started the whole project, I shared this cute little inspiration board that I did up for the room revamp…..
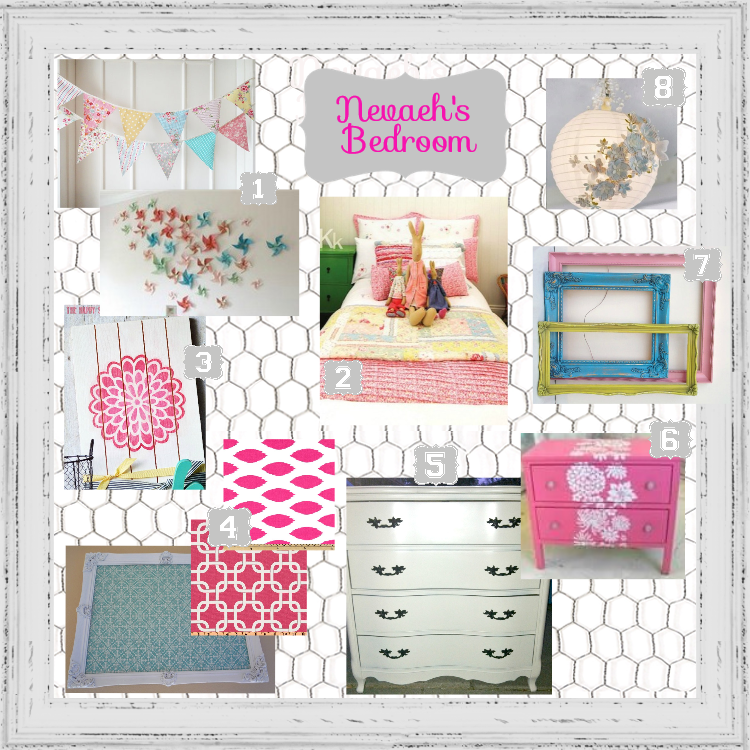
See #8 up there in the top right corner?? Ya, that’s the inspiration for this sweet lantern…but we did a bit of a different take on it.
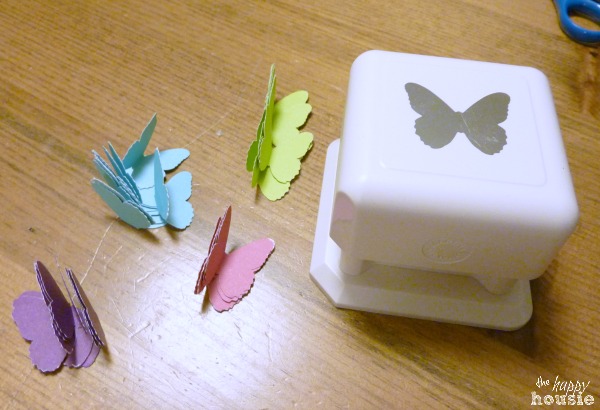
To make this I used:
– a paper round lantern (from Ikea)
– a butterfly punch (from Michaels)
– a glue gun and glue
– pretty colored cardstock
-lighting supplies to create a hanging bulb from your ceiling fixture- talk to them at your local store to see exactly what you need to do this.
At the lighting store, tell them that you want a cord with a single light bulb outlet on one end that you can wire directly into your ceiling. Alternatively, lots of places sell cord kits if you want this lantern to plug in somewhere and operate on a switch rather then being hard wired in.
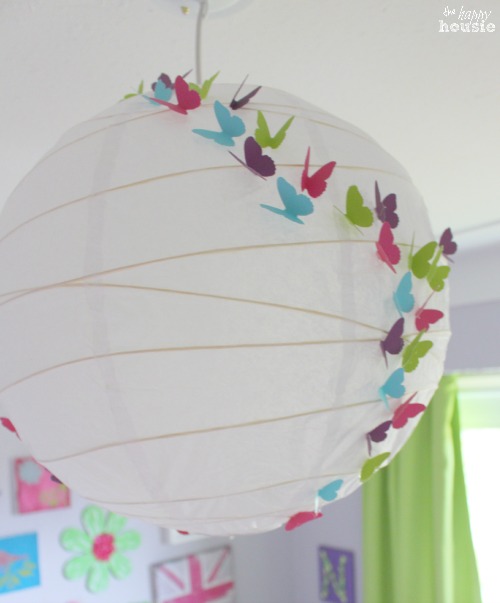
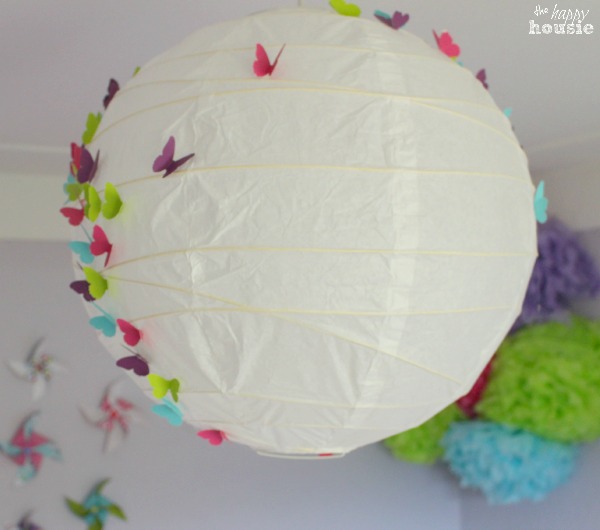
It was really easy. All we had to do was punch a bunch of colourful butterflies out of the cardstock, and then use the glue gun to attach them in a pretty random pattern. Don’t go to heavy with them, and play around with the spacing a little before you start gluing. Trying to remove them once they are hot glued will destroy the paper lantern.
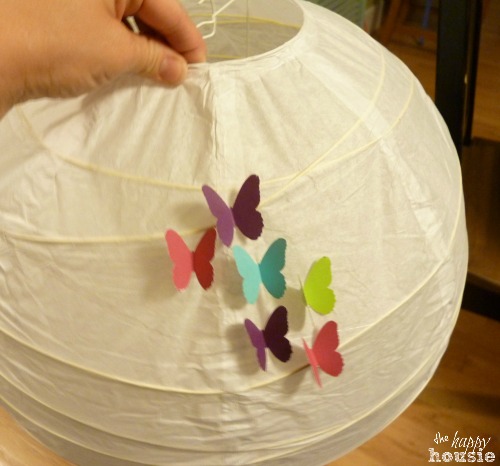
We spaced the delicate looking butterflies out a little and had them curve around and up the lantern, kind of branching off at one point with a few heading in another direction. Like they are flying!
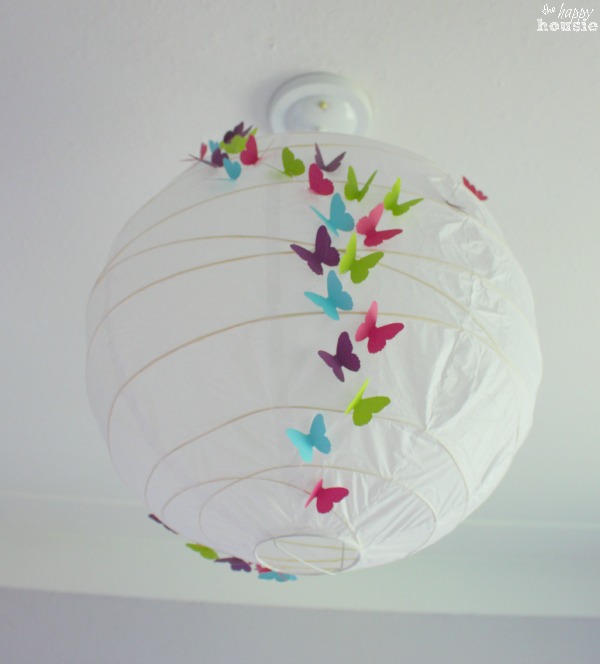
All done! How cute is that??? Do you think my boys would go for something like this in their bedroom??? (probably not unless it was sharks instead of butterflies…)
Like this?
Pin it to remember it!
I can’t wait to share a few other pretty little projects that we did for her bedroom….and then the big room reveal next week!!
Thanks for reading. And remember my housie friends, HOME isn’t built in a day. Enjoy the journey!


I may link up at some of these fabulous places below, for more info check out housie parties:
Monday Funday , Give Me the Goods Monday , Inspiration Monday, Nifty Thrifty Tuesday, Tip Junkie, Project Inspire{d} , Inspire Me Tuesday, The Scoop, Hit Me With Your Best Shot, Wow Me Wednesday, Whimsy Wednesday , From Dream to Reality, The Inspiration Exchange, Wow Us Wednesday, Live Laugh Rowe Live Laugh Linky, Thursdays Are Your Days, Inspire Me Please, Catch as Catch Can, Fabulously Creative Friday, Party Junk, Pinworthy Projects , Link Party Palooza,, Weekend Bloggy Reading, Strut Your Stuff Saturday, Spotlight Saturday, Get Schooled Saturday, Overflowing With Creativity , , Suburbs Mama , That DIY Party


This is such an adorable project, Krista! Pinning!
That is adorable Krista!!! So much fun…love all the colors! Pinning! 🙂
SO cute, Krista! I’m pinning for inspiration for Lily’s room! 😉
So cute for a little girl’s room, and it definitely looks more complicated and expensive than it is.
Very cute, Krista! Love how your projects are easy and don’t cost a ton! (right up my ally!) Thanks for sharing. I’m sure that little girl loves her new room!
How fun! I love this. Haha I’d make one for my room. I have 2 hanging in the corner of my bedroom. I love them.
this is such a fun idea! emmy would love it!