
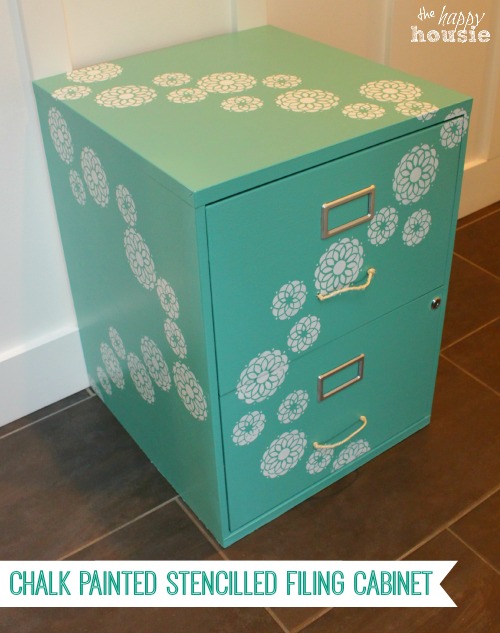
One Bliss – fully Flowered Chalk Painted Stencilled Filing Cabinet
Today I can’t wait to share a beautiful little furniture transformation: a Chalk Painted Stencilled Filing Cabinet.
But before I start, I have something to admit. Ya, um….the truth is we kind of started a whole new project around here.
If you are a regular reader you may be thinking “but you still haven’t finished your boy’s bedroom! I thought your word of the year was FOCUS… as in, finish one project before starting the next!!”
Ya, you would be right. Clearly I’m doing really well with that FOCUS thing.
Anyhoo… moving on. So, we have started a new project! Yay!! In an effort to get organized we are turning a little closet right off the kitchen into a command central zone. A mini home office of sorts!
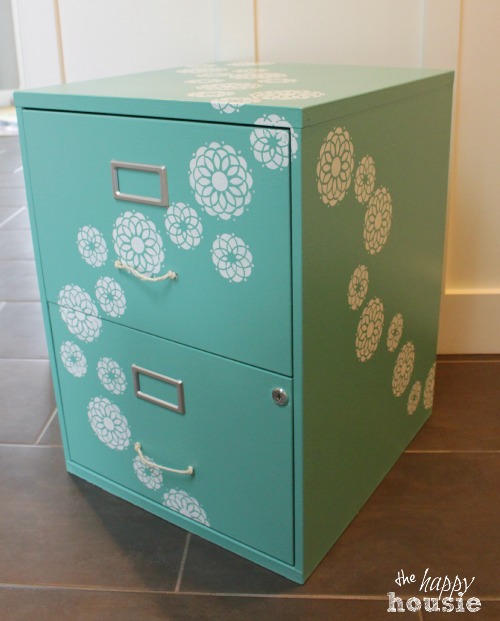
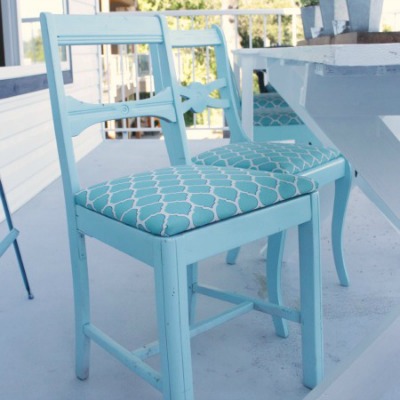
And of course it needs to be pretty first and functional second. So when I picked up a new filing cabinet recently (after searching for weeks for a used one I finally gave in a bought new… ouch), I knew it needed a little painted transformation. And here is what I came up with…
To turn this bad boy from boring black to blissfully beautiful I used:
![]()
– a metal filing cabinet (I purchased mine at my local Staples after a long and unproductive hunt for a used one)
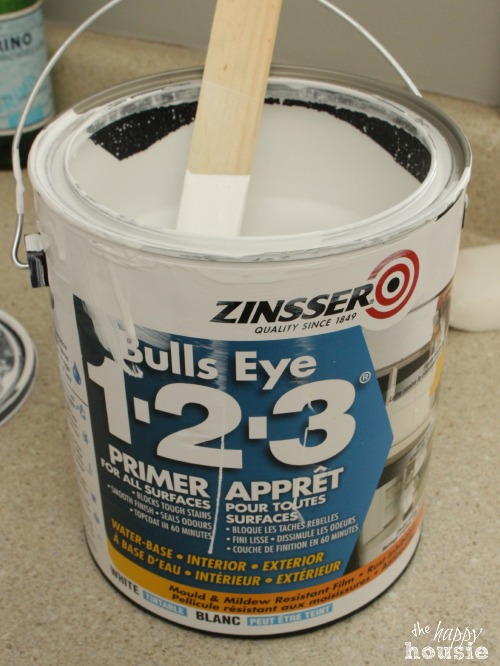
– a good quality Primer
– foam roller, tray, paint brushes
– Country Chic Chalk Paint in Bliss and Simplicity (white)
–a stencil (made by Martha Stewart Crafts) and a foam roller
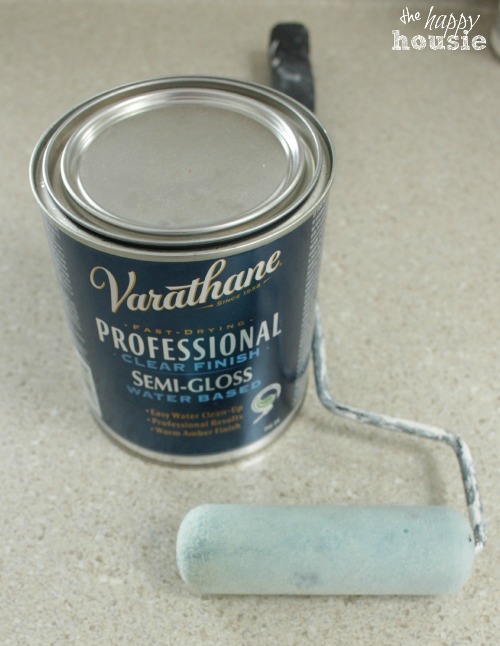
– a clear acrylic sealer (I used varathane brand as I had it on hand but Country Chic makes a Tough Coat product that would work well too)
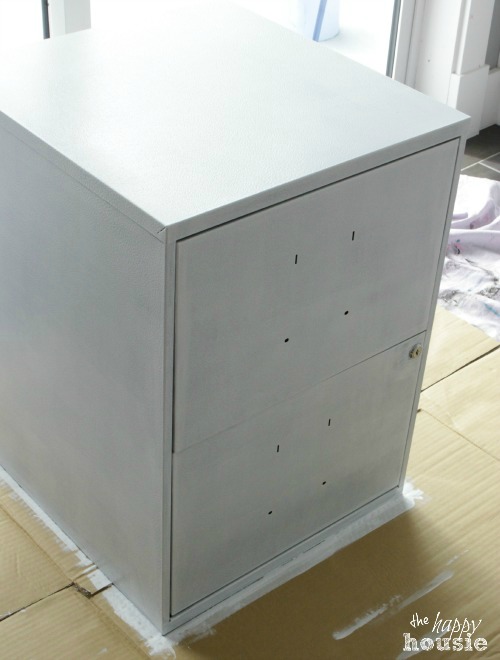
Here is how she started out….

Since she was so shiny spankin’ new I gave her two coats of an awesome primer (I did two coats to give a good amount of coverage over the black before I moved onto my precious Bliss chalk paint).
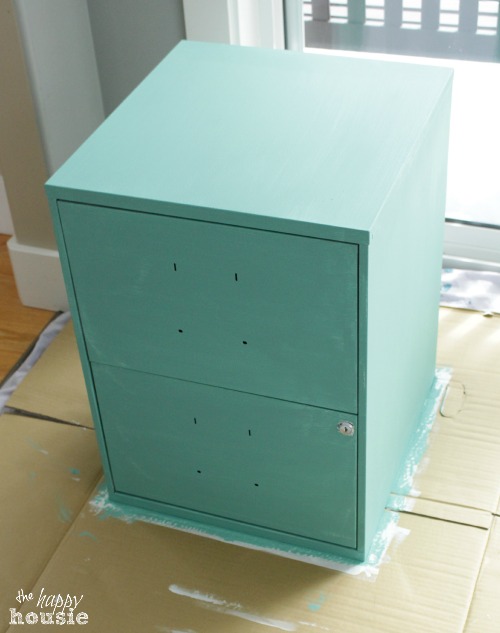
After my two primer coats I did two coats of Country Chic Chalk Paint in Bliss… here is how she looked after the first coat only.
Once the second coat had dried I used a stencil from Martha Stewart Crafts (I think you can get them at Michaels though I borrowed mine from a lovely friend)… and I went to town adding some serious flowery interest to her….
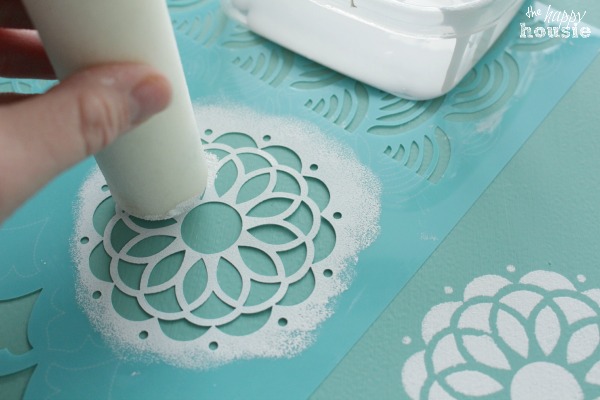
I used the end of a foam roller that I had dipped into my Simplicity Chalk Paint and then wiped most of it off against the edge of my container before gently pressing down directly onto the stencil.
Normally, I held the stencil down with one hand while the other hand ‘dobbed’ the paint on… but I couldn’t show you that part and take the picture at the same time. (Sometimes it might be easier to have a third arm).
I went with a sweeping pattern of flowers, starting with the larger flowers, then going back once they were dry and filling in the gaps with the smaller flower stencil. That way I wasn’t rubbing my stencil against any wet flowers and smearing the paint every which way. I LOVE how quickly my Country Chic paint dried- it made it so that I didn’t have to wait at all to get my stencilling down.

I also finished her off with a coat of a clear acrylic sealer rather then wax… just because she is metal and I really want the paint to stand up to my officey tasks.
You might notice that I skipped the standard handles to as well – instead I used a little bit of twine that I had on hand to make my own handle. I just cut it to length, fed it in through one hole and tied a knot at the end. Then I tied a second knot outside of that hole… measured the length I wanted and tied off a third knot, then inserted the last end of the twine in the second hole, and tied it off tightly to hold it all in place.
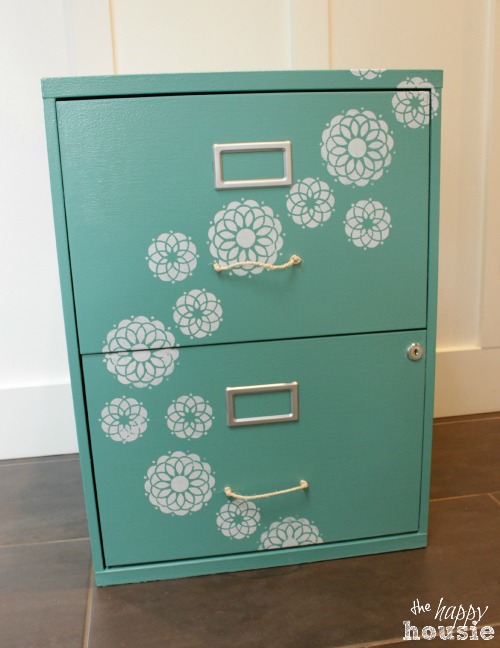
What do you think? Isn’t she pretty?!?
So I am pretty much in absolute stark-raving-mad love with the colour Bliss. I was giddy while I was painting this piece and it’s not because of paint fumes (there were no fumes). Call me crazy but just looking at this color makes me joyful. Kind of reminds me of looking at the beautiful ocean on our trip to Mexico…or the ocean in Greece when my husband and I travelled there years ago. I guess that is why those smart gals at Country Chic called this colour “bliss”. They really know what they’re talkin’ about.
Like this?
Pin it to remember it!

Do you have any experience painting metal? How did it work out for you? What about using chalk paint??
Thanks for reading. And remember my housie friends, HOME isn’t built in a day. Enjoy the journey!


I may link up at some of these fabulous places below, for more info check out housie parties:
Make the Scene Monday , Monday Funday , Give Me the Goods Monday , Inspiration Monday, Craft-o-Maniac Monday, Nifty Thrifty Tuesday, Tip Junkie, Project Inspire{d} , Inspire Me Tuesday, The Scoop, Hit Me With Your Best Shot, Wow Me Wednesday Whimsy Wednesday , Fall Into Fall , From Dream to Reality, The Inspiration Exchange, Live Laugh Rowe Live Laugh Linky, Thursdays Are Your Days, The Weekly Creative , The Creative Connection, Inspire Me Please, Catch as Catch Can, Fabulously Creative Friday, Party Junk, Pinworthy Projects , Link Party Palooza,, Weekend Bloggy Reading, Strut Your Stuff Saturday, Spotlight Saturday, Get Schooled Saturday, Overflowing With Creativity , , Suburbs Mama , That DIY Party
Disclosure: I am a member of the Country Chic Paint Blog Squad for 2014. But of course all opinions are 100% my own.


I love this! I love the color, too. I have a metal file cabinet that’s in need of being painted. Badly. I gave something like $5-$6 for it. It’s too cold here now to paint it, but come Spring, I’ll be doing some painting. I love the coat closet make-over. I’d love to do this to ours.
Thank you for the I formation and instructions. Awesome!
While I’m not overly fond of your color choice or the stencils (that’s just my opinion and it’s not my furniture or house, so Bliss on with your flowery self), the walk-though on how you customized your file cabinets was exactly what I was looking for.
I’ll be doing something similar with the some empty HT Tea Blend tins. I’ll be leaving a stripe of the original paint color on the sides of the lid and leaving the copper bottom and insides alone, but I’ll paint the rest with black chalk paint. Then, I’ll use chalk that matches the original paint color to make the labels (front and top) and a layer of spray-on Mod Podge as a final, clear fixative layer.
Just like that, I’ll have a matching set of tins for my breakfast area – cereal (oatmeal or granola) coffee, teas, and mix-ins (whatever sounds good for adding to oatmeal or granola at the time). Four different flavors in four different color tins makes a set of four different colored breakfast containers.
Thanks for the perfect instructions!
Hi Krista,
Love your furniture transformation work that you have done. It’s hard to understand it but seeing this amazing changes that are so amazing.
This is very pretty! How is it holding up? I’m nervous about doing this just because I’m scared of it getting scratched easily. I would use it for a relatively high traffic area. Thanks!!
Hello! Ours has held up absolutely perfectly. I think the combination of the high quality primer and the chalk paint is really strong and effective. That being said- mine is not in a very high traffic area as we keep it tucked underneath our closet desk. I think it would hold up really well from the feel of it – but our filing cabinet originally had a bubbly/bumpy texture to the metal and wasn’t totally flat and shiny which might account for how well the paint adhered. A shinier finish might be more difficult for adhesion and you would want to sand it a bit first to give it some “tooth”. Good luck with your project! I still love how ours turned out!!
I know it is more than a year now since you have posted but I’m trying to get my ‘organization’ on!!! I love the color & the idea of the file cabinet painting. Awesome. Have you gotten any feedback regarding the chalk paint vs. any other type of paint that can be used. I haven’t looked at the prices in over a year, but I think that they are more than regular paint … could be wrong.
Love it & this is one of my weekend projects.
Hi Colleen,
You definitely don’t have to use a chalk paint – you could use a regular paint. I can’t advise you as to how well that would last, but I think the most important part is using a really good primer. Also, paint may not adhere quite as well to a smooth finish cabinet as to a slightly rough textured cabinet. Ours has held up better then I could have hoped for! Good luck with your project:)
I paint with metal items and I am always looking for inspiration. I have painted several of the retro metal trash cans for recycling. I spray paint then use chalk paint then maybe sand off some of the chalk paint and I am looking for more inspiration. I will definitely look at some interesting stencils. I have several crazy plant stands and an outdoor chandelier and I am painting right now. I started a vintage lamp stand that is metal, and I am still looking for that right color. I do use a lot browns with copper and gold. Would love to see what some others are doing.
This is so awesome! I love it! I love that primer as well! I use it for almost everything. But… you didn’t sand the cabinet at all? Just the primer straight on it? Also… wondering if you have used this primer on that cheap, veneer type “wood” furniture? I don’t know what it is called, but wondering if the primer works as good on that as it did here? Thanks. 🙂
Hi Rachelle! I didn’t sand it at all- just primed. But it didn’t have a very shiny finish and it was a little bit textured rather then a flat metal. If it had been a flat metal shiny finished I might have sanded it a little first to give it some “tooth”. I think you can definitely use this primer over veneer – I have. But I would do a hand sand first on your piece to give the finish some “tooth” for the primer to adhere to. And if you can leave your primer overnight to dry and harden and really “take” to the piece, then I think it makes for a better finished product. Good luck with your project!
Did you paint the interior of the cabinet also? I only ask is because I’m notorious for not closing the cabinets. One is a flip door and hasn’t been closed in at least a year.
I didn’t paint the interior, Kym, but I don’t see why you couldn’t… I think it would hold up just fine. Good luck with your project!
I love love this idea!! What a better look for a plain old metal cabinet.
Do you happen to remember how much paint it took to paint it? I don’t want to buy too much or too little.
Hi Rebecca! I used a Quart of Bliss but I had a ton left over. I have done a few projects out of the same can, so I am sure you would have more then enough with even the Pint sized can, though if you are going to use more of the same colour for other projects, the quart is always the best value. Good luck with your project!
Hello! I love this beautiful piece, and wanted to ask you something…I see so many of these file cabinet makeovers that use spray paint, and wondered if you found that using rollers and brushes made it more difficult to get a smooth finish? I am not the best painter 🙂 but would like to use paint instead of spray paint on my project, and thought I should ask! Also worried that paint won’t hold up as well as spray paint?? Thanks so much!
Hi Deedee!
I primed the cabinet first with a really adherent primer – I believe it was a Kilz brand product. It is meant to adhere to metal, among other things. I also used a foam roller which gives a smooth finish. But my cabinet had a slightly mottled finish to it (very, very slight) and wasn’t totally smooth like many old filing cabinets are. As such, I can’t totally comment on the smoothness of the finish but can only say that the new paint finish is as smooth as the cabinet was to begin with (if that makes sense). Using a foam roller and perhaps asking your paint store for a self-leveling (or smoother finishing) type of paint would help. I also spray paint a lot of projects, but there is quite a learning curve to spray painting as well and you can end up with a lot of drips until you become quite a proficient spray painter. Let me know if you have any further questions! Good luck with your project:)
Krista
I don’t know if it would work for this type of paint, but I know there’s something called ‘paint extender’ that can be added to the sort of paint you use for the walls in your home. My hubby and I poured the recommended amount through a strainer into the paint, mixed it until it was fully blended, and painted our walls. The additive caused the paint to go on smooth with no roller or brush marks at all. It might be worth a shot.
That’s the exact same color that I painted mine. I love the stencils that you added. I have mine in the guest bath. It holds a ton of extra toilet paper!
I love that color! I am possibly more in love with the stencil. I went online and to a Joann store and cannot find it. Oh my heart is breaking. Do you have a reference number or name I can hunt it down online? Thanks so much!
Kolleen, I don’t have a reference number because I borrowed it from a friend…but it is Martha Stewart brand and I am pretty sure that she got hers at Staples a couple of years ago. It is great isn’t it? I have used it on a few projects now and was sad to give it back!!
I have looked all over Staples, Joanns, Michaels, Amazon, Hobby Lobby. It’s gone. 🙁 I am on a mission to make my own.
The stencils are so pretty! Fantastic transformation!
I love that you too are talking about focus! Maybe it’s us creative types? I must have 20 projects in progress and a notebook full of ideas I can’t wait to start. Either way I love this filing cabinet and the stencil you chose:)
Haha, must be the ‘creative’ thing… all the ideas keep coming but the time we have in a day or week or month never increases. I try to remind myself of my own fave saying… “home isn’t built in a day. enjoy the journey…” but it is tough at times!! Thanks for hopping by and your kind words!
My husband and I are about to add on to our house. One of the rooms is going to be a multipurpose room with an office portion. I saw this on Pinterest and told him we’re going to have to spruce up our filing cabinet just like you did!
I’d be thrilled if you’d link up at this week’s Off the Hook!
Thanks so much for coming by and your sweet comments Lauren!! And thanks so much for the invite!
This is the prettiest filing cabinet I’ve ever seen, Krista! I’m especially impressed because I am stencil-challenged! Love the color too! 🙂
Hi Christy! The stencilling actually turned out to be a lot easier then I expected… maybe it depends on the quality of the stencil? These Martha ones worked well. I am lovin’ the color- of course!
This is so cute! Great job!!
I love this idea Krista! I’m in the middle of gathering ideas for my office and I’m considering working with what I have to save money and this is the perfect inspiration. Thanks for sharing friend!
So fun!!!
🙂 Linda
Love the graphics Krista, and in my favorite color too, Nice Job!
Very, very cool Krista – it looks sooo much better!
Um, I am in love with this. I have two used filing cabinets in my basement, just waiting to be painted. I wasn’t even actively LOOKING for one, but when I happened upon a big one on Kijiji for $10 (and the guy ended up telling me not to worry about it, so it was really free) and then a small one at Value Village the next day for $6, I’ve created a bit of a stock pile of them. I’ve been considering going blue/mint/aqua for it, and this just may have convinced me!! It looks SO amazing!
Great work!
Love that color. I recently painted an old one white and that made it look so much better. This knocks it out of the park!
this is such a wonderful transformation.. from blah to WOWZAH! i especially love the colour you chose! looks AH-mazing!!! a must pin…
I love how it turned out. I especially love the color of the cabinet.
I shared this post on my blog’s facebook page and twitter page.
https://www.facebook.com/HomeIsWhereIBelong
Thank you so much for the share!
Ahh! Nothing like adding a little cheer to boring paperwork. Turned out so cute! Pinning!
So pretty! I’m starting a petition at work, I think all our filing cabinets should look like this!
Love how this turned out!! It looks so fresh and unique!!
Oh how fun! I love it Krista! The stencils make it (and the color is right up my alley! 😉 )
Nancy
Amazing transformation. You made a boring necessity fun!
I have a filing cabinet in mega-need of a makeover…so this is really inspiring to me, Krista, as are all of your gorgeous creations. (The minty color is fabulous.) Off to pin!
This came out gorgeous! Great job!
Love it! So fun
Yes, she is pretty and that colour is pure bliss! I just bought “baby aqua” … Seems a few shaves lighter, to do some end tables (but I am known to run back to the paint shop and get them to darken it) 😉 so I might end up with “bliss”! Beautiful makeover Krista!!
I love the color! It’s so pretty. I want one!
~FringeGirl
Krista – It’s awesome! Why is it you can’t find something used when you want it – at any other time you’d see 27 filing cabinets! LOL.
I love the color and tip to use two coats of primer. I have an office with two black filing cabinets – and I’ve never tackled them – but I’m inspired now… Thank you! Would make my office a lot nicer!
Julia
Love everything
Krista, now THIS is a filing cabinet I would love to have in my office and wouldn’t mind actually having to file! 🙂 Just beautiful and you did a fantastic job, as always! Thanks for sharing and pinniing – happy Friday!
Love it! And love your color choice too. It’s going to look wonderful in your new command center!