
A Quick’n’Easy No-Sew Fat-Quarter Pillow and Our Pink Lemonade Inspired Front Porch
I finally tackled a project I have been wanting to try out for a few months now – a No-Sew Pillow Cover! It worked!! And even better, I made it from a $1.97 fat quarter! I am so excited to share this quick and easy tutorial with you… and can’t wait to try this project again with some bigger pillow forms and some other types of fabrics. 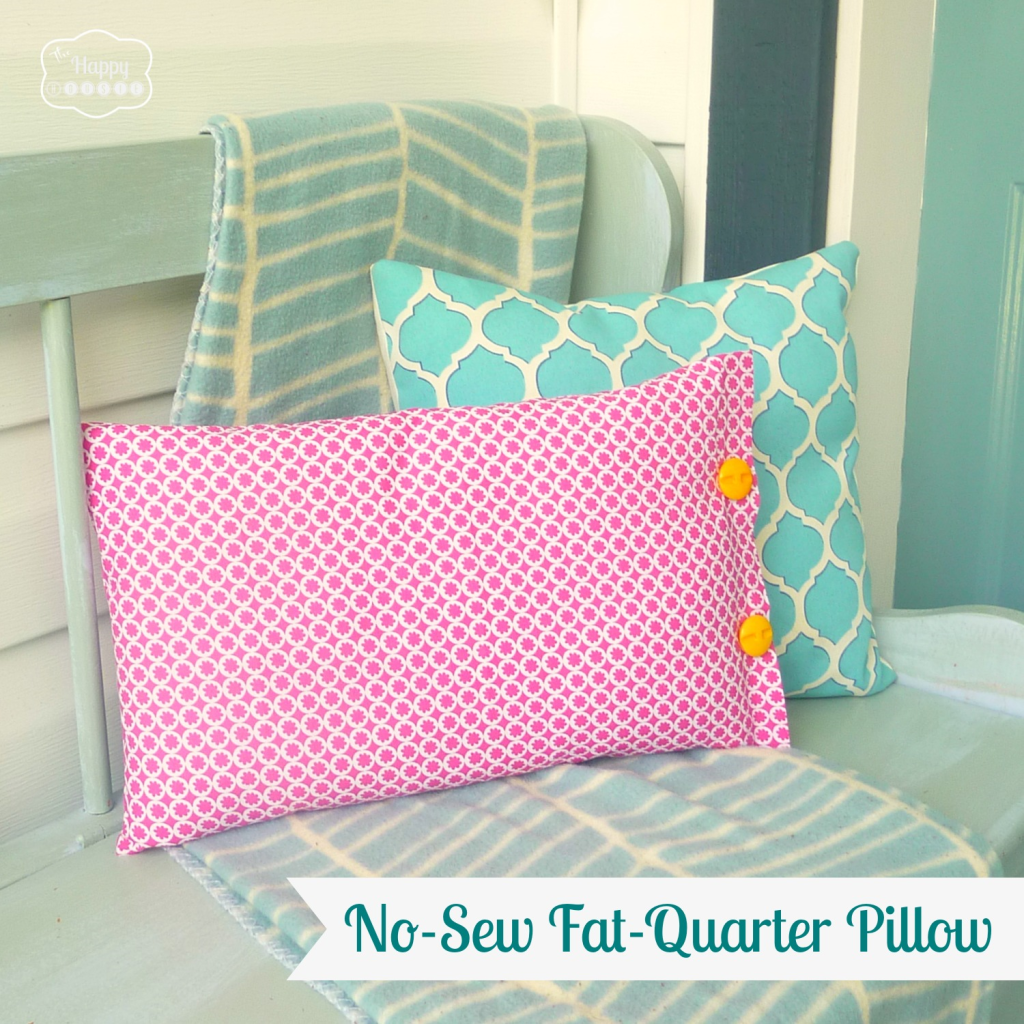
One of my favourite treats to enjoy in the summertime is a cold glass of delicious pink lemonade. I love the mix of tart and sweet and find it so refreshing to savour on a hot sunny day. Not only that… it is the perfect place from which to draw a little decorating inspiration…
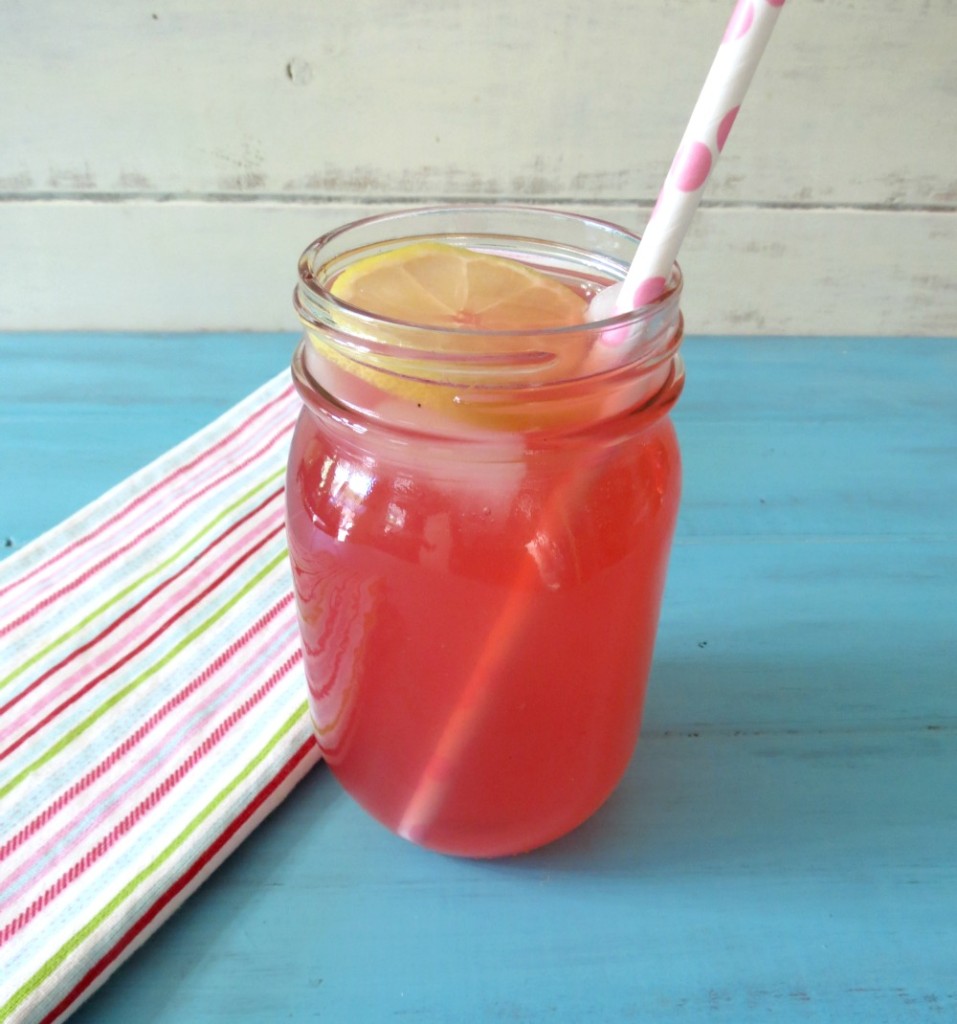
In honour of summer’s soon-to-be (fingers seriously crossed) arrival I decided to add a little tart & sweet pink lemonade flavour to our little front porch. One way was through the wreath you might have glimpsed on our front door during the recent summery house tour update. (I will be back soon for a quick DIY on that). Another was through a few little changes on the porch itself – such as this quick and easy no-sew pillow made from a fat quarter.
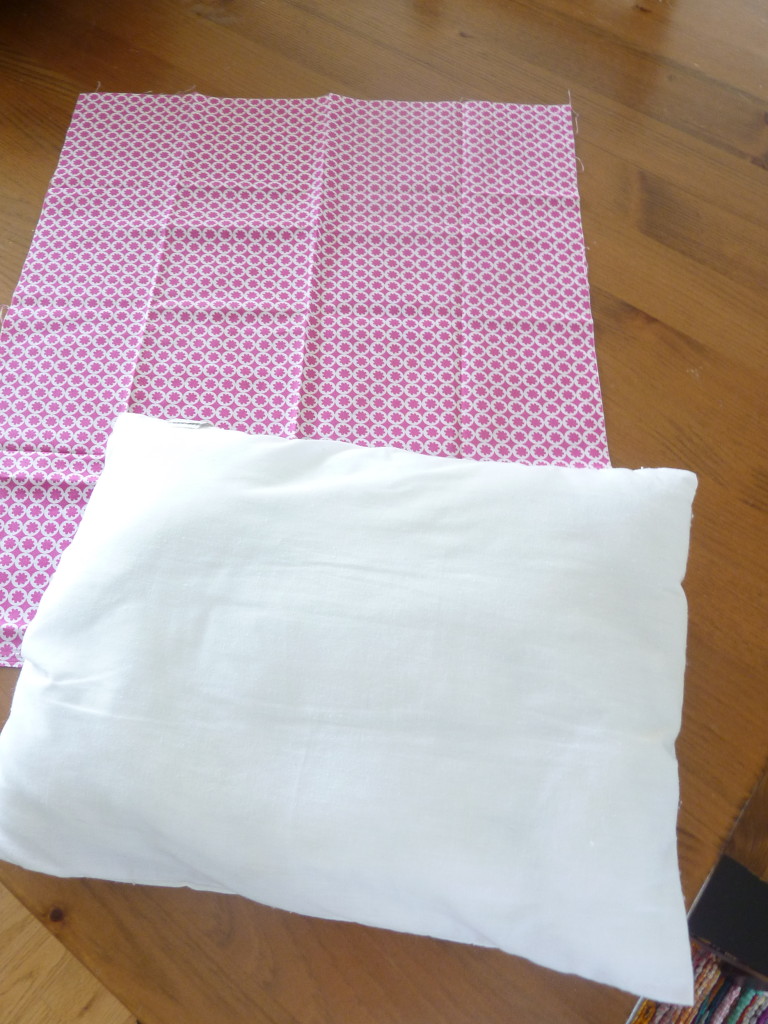
I started with a fat quarter of fabric and an old pillow form left over from my son’s nursery.
A little info about fat-quarters:
If you are not familiar, a fat-quarter is a piece of fabric that is a quarter of a yard in size but that is cut differently than fabric is usually cut. Most fabric is cut of the bolt and a quarter of a yard would measure about 9″ by the width of the fabric (44″ to 54″ or larger depending on the width of the bolt).
Imagine that a yard of fabric is a peanut butter sandwich. Now cut your sandwich into quarters. Each equal sizes. That is a ‘fat quarter’ of fabric, and it measures 18×22″. Fabric cut this way is usually quilting fabric and is best for quilting and craft projects, but I think it is fine for lightweight pillows that won’t get a lot of wear and tear as well. You can buy pretty little fat-quarters at fabric shops, craft stores, and even Walmart – where I picked up mine. You could likely do this with a larger pillow form but might need two fat-quarters to accommodate the size of your form. You’ll have to “do the math” depending upon what type of form you are working with. See my simple envelope pillow tutorial if you want some help with figuring out your measurements.
Now back to the tutorial:
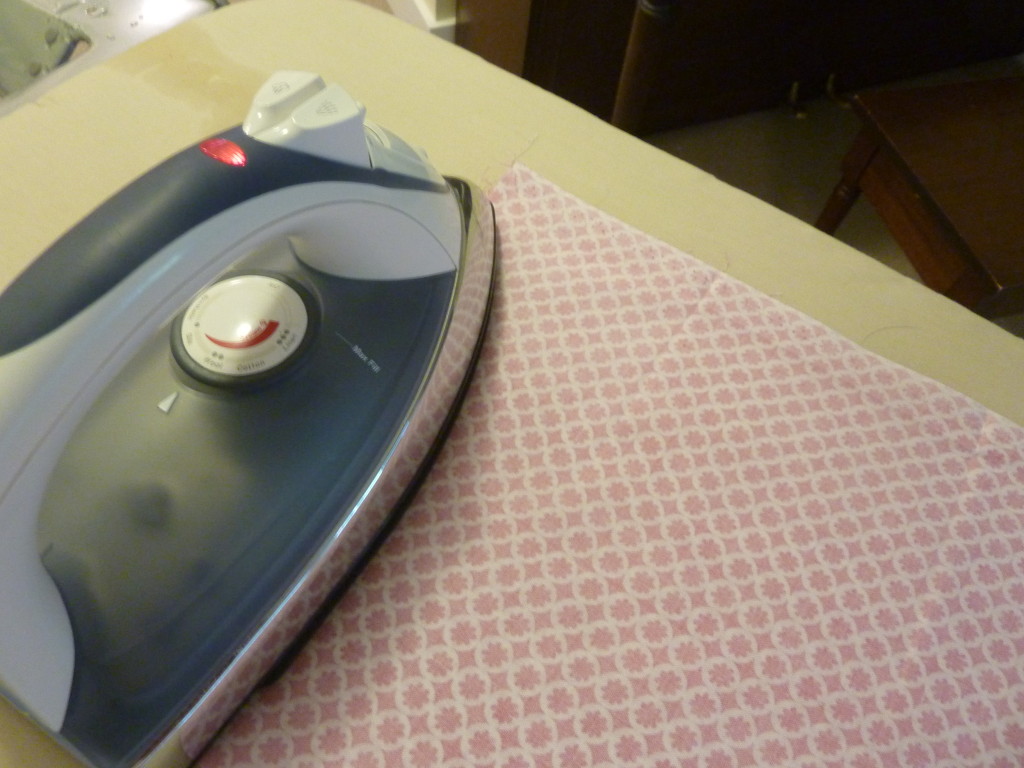
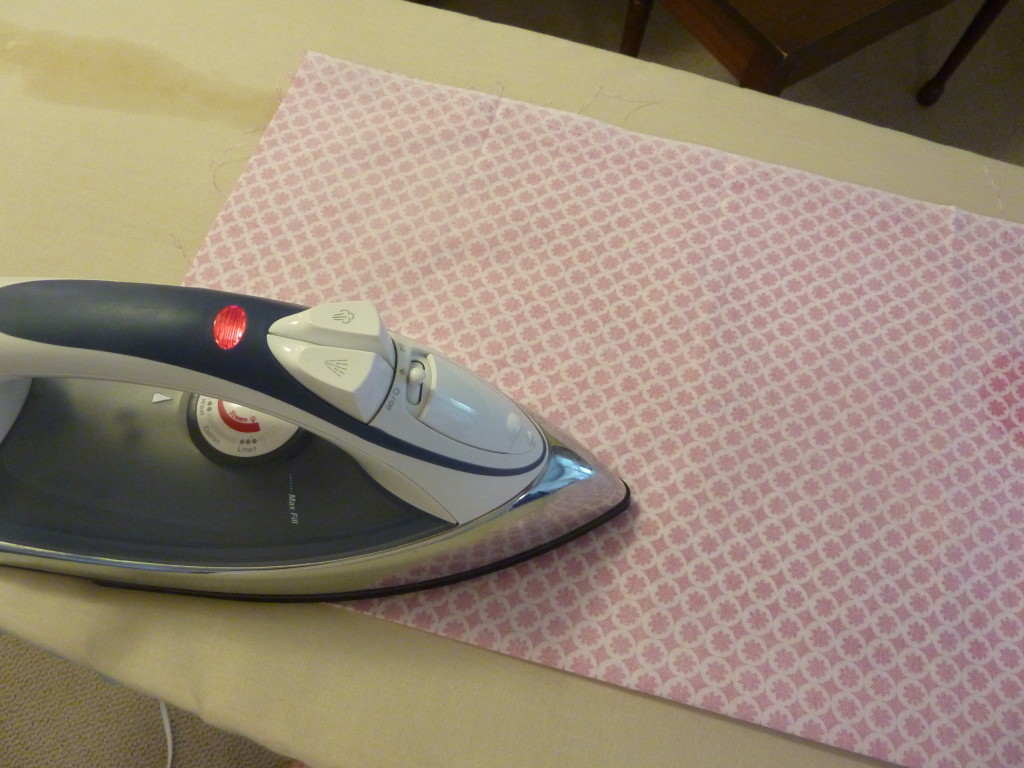
First I ironed my fabric.
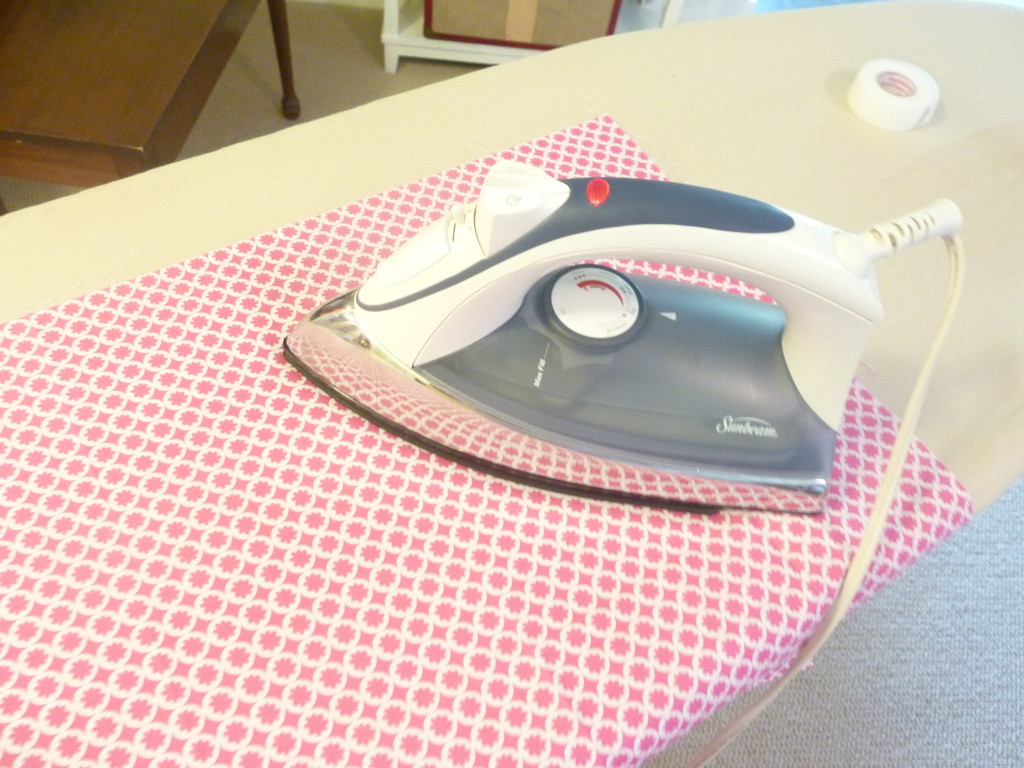
Next, I folded it in half, with the “right” (or patterned) sides facing together and ironed it smooth. If you were making a larger pillow, you could easily do this with two separate pieces of fabric and would just have to no-sew three of the sides rather than two (since one side of mine was the natural fold and didn’t need to be no-sewed).
I opened it up and then folded and ironed a hem (the same width as the no-sew hem tape) along on long side of the fabric. After ironing the hem, I placed the tape inside the hem and then ironed (according to package instructions) in order to create one good hemmed side.
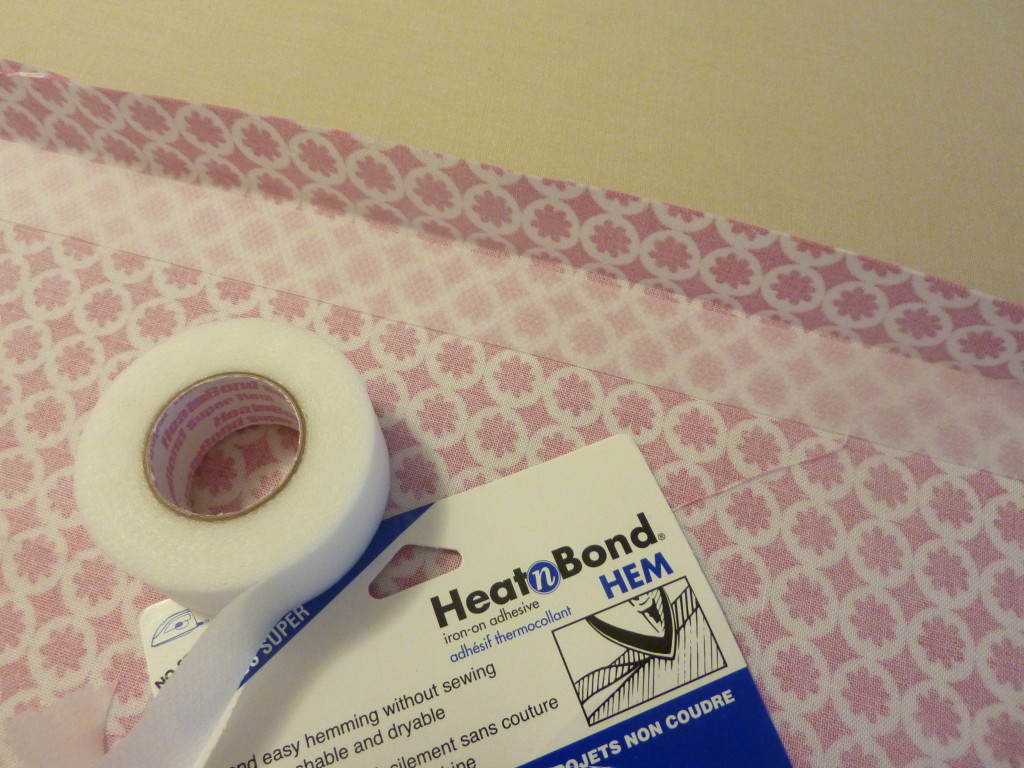
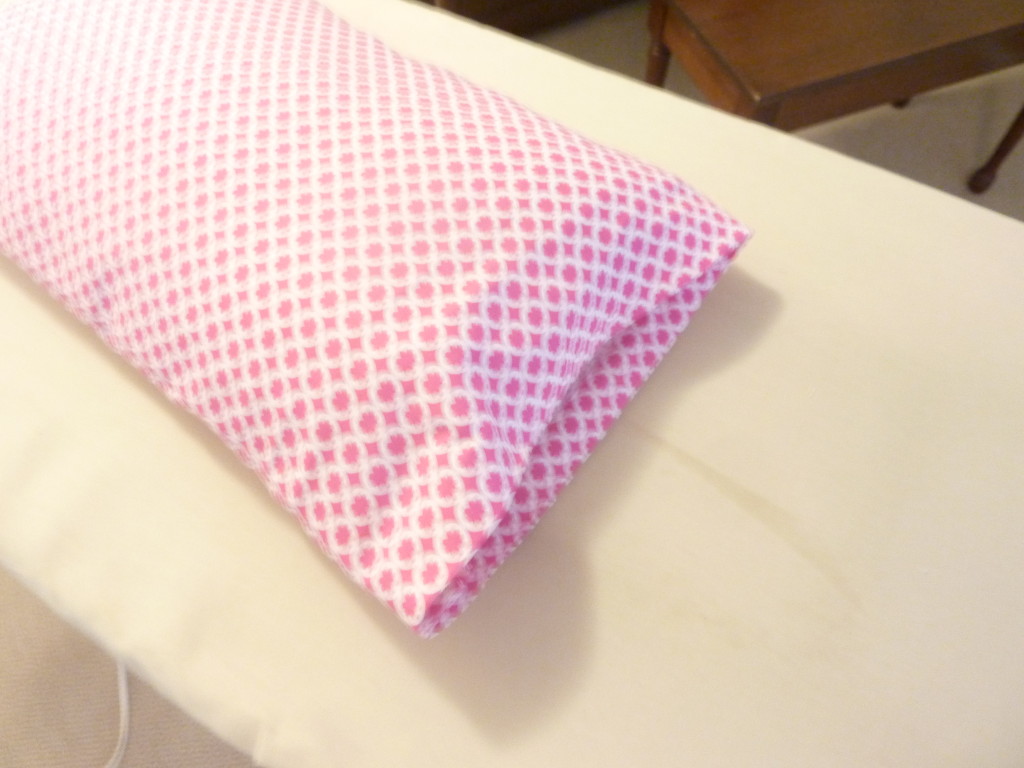
I opened it up and placed my no-sew hemming tape inside the top and one of the side edges – don’t no-sew together all sides or you will never get your pillow inside it!
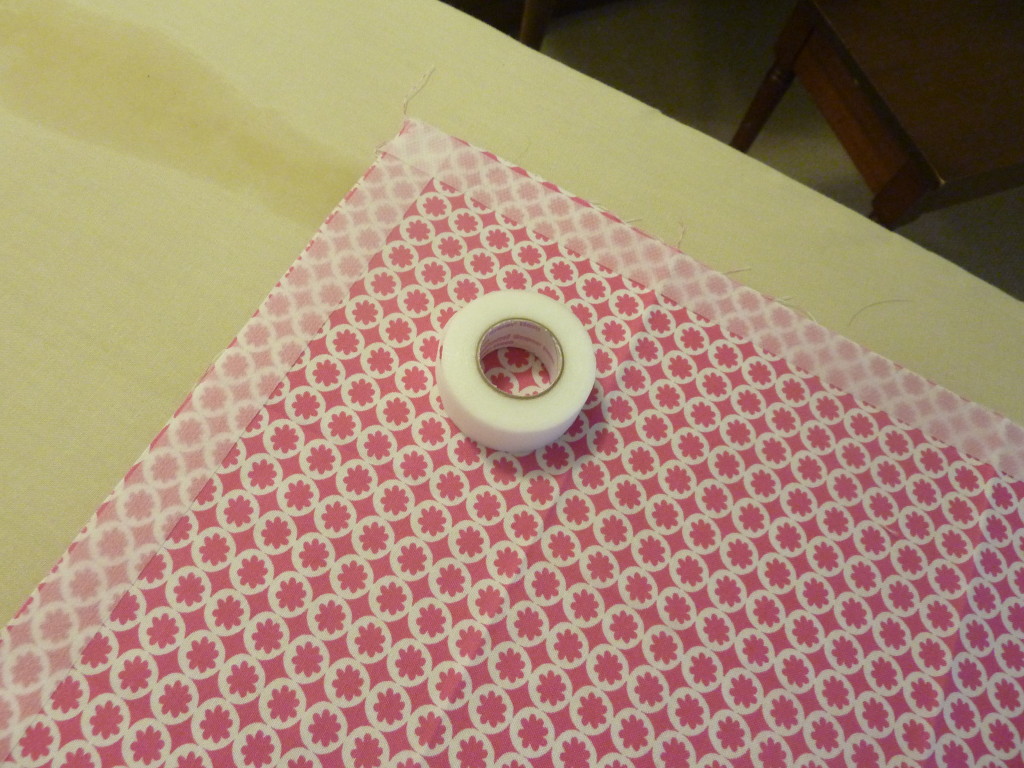
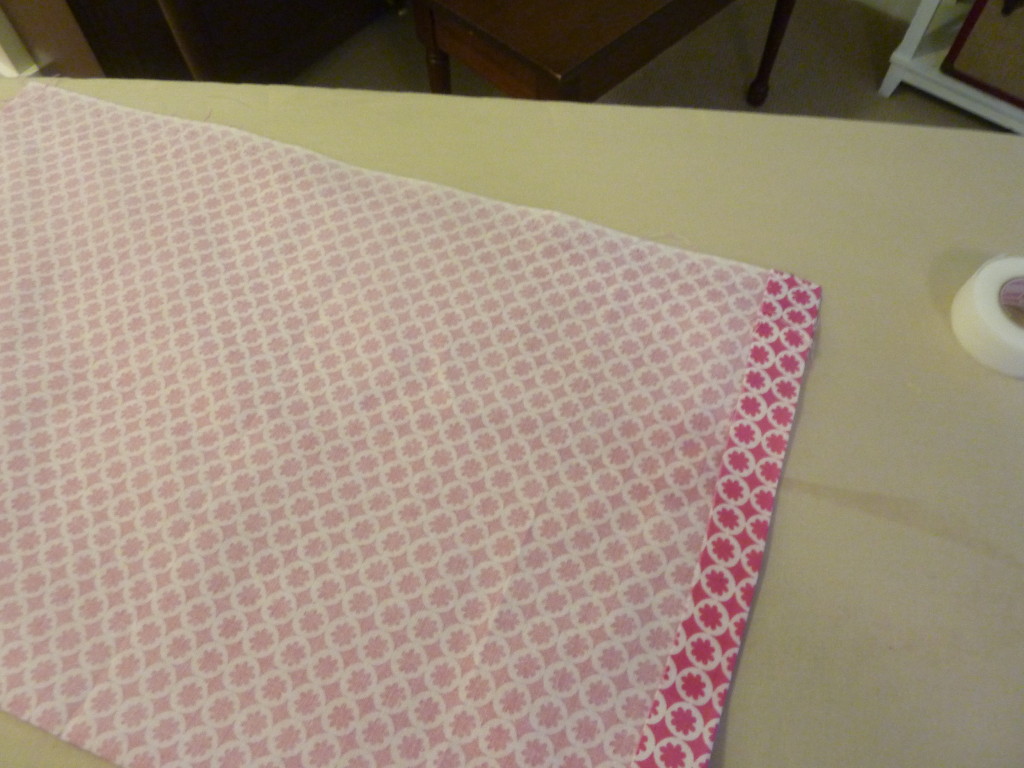
From there I folded the right sides back together and then followed the package instructions for ironing to set the no-sew tape.
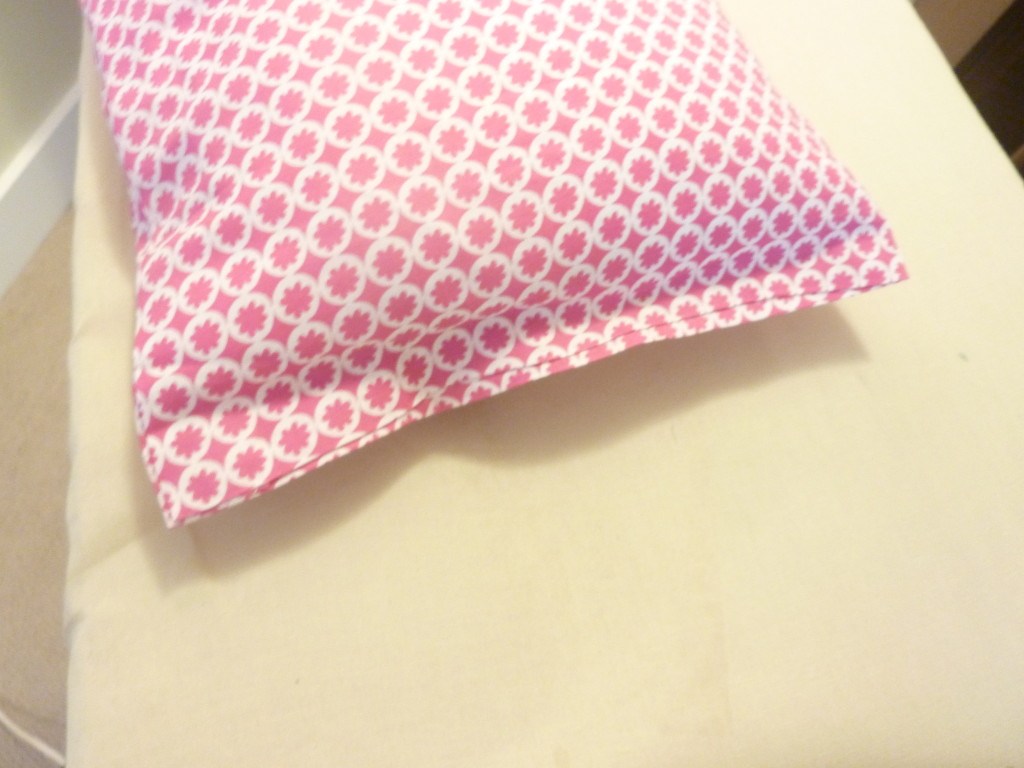
NOTE: the one good hemmed edge is your open edge. After the rest has been no-sewed together, turn it inside out and you have a beautiful little pillow case. Stuff your pillow inside of it, place some more no-sew tape along the (already hemmed) good edge, and iron it together… this is the trickiest part.
The finished product… ready for some button embellishments
I hot-glued some bright yellow buttons onto the edge and bing,bang,bong… a pink lemonade pillow for ya!
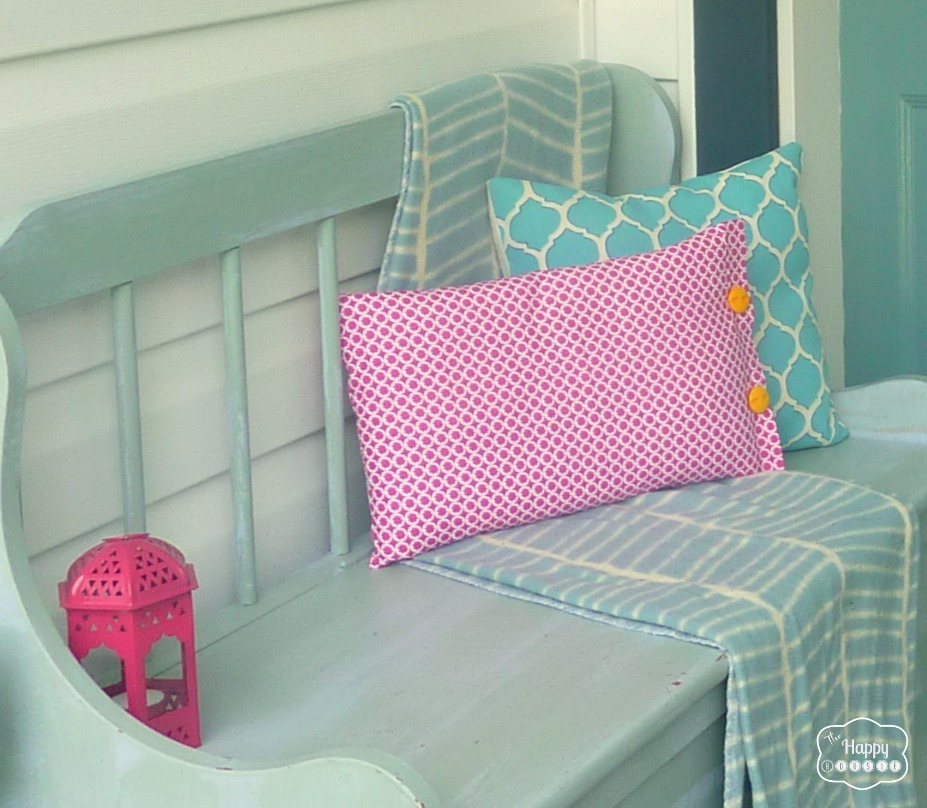
I’m pretty thrilled about the fun bright colour this adds to the front porch this summer…
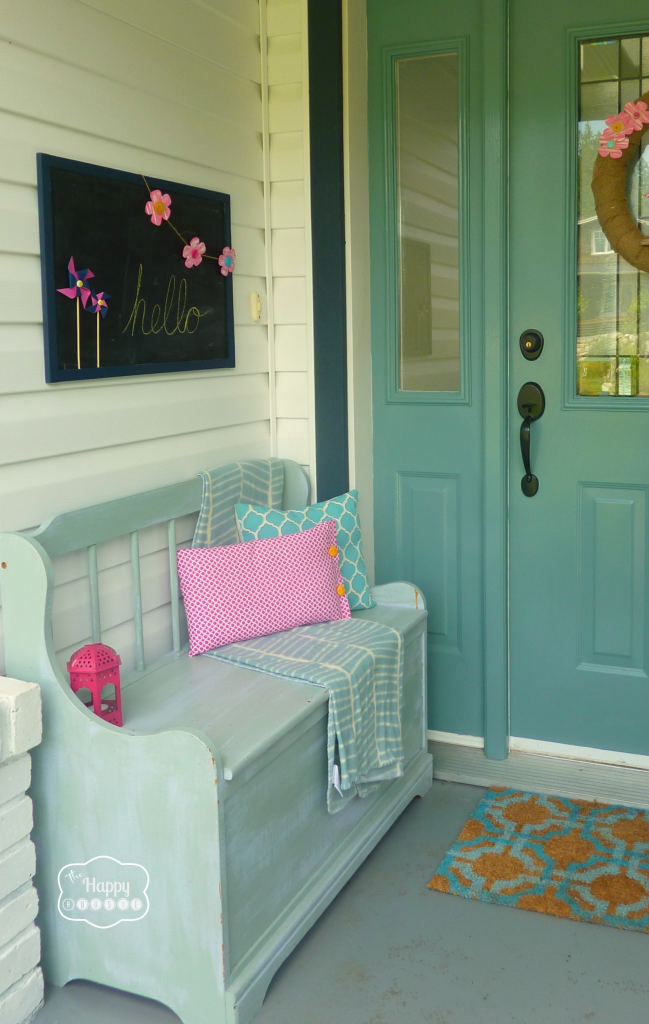
Plus, I so rarely get to use pink in decorating that this is the perfect spot to incorporate some.
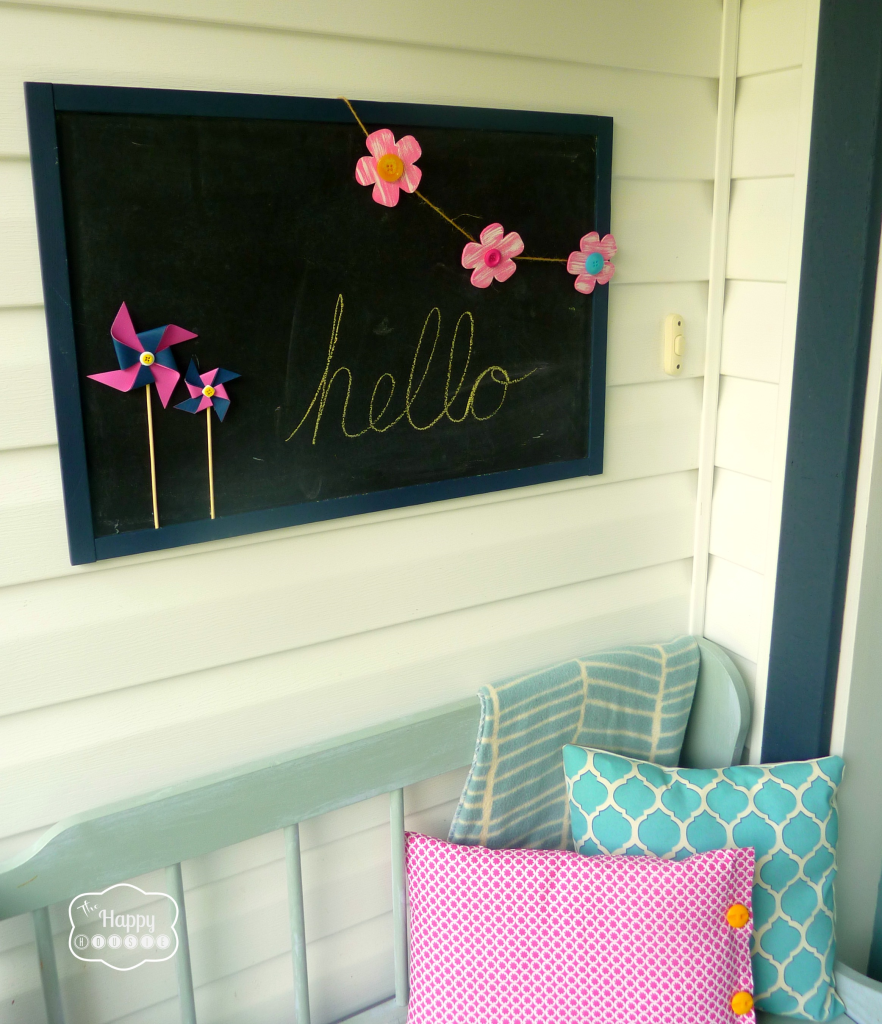
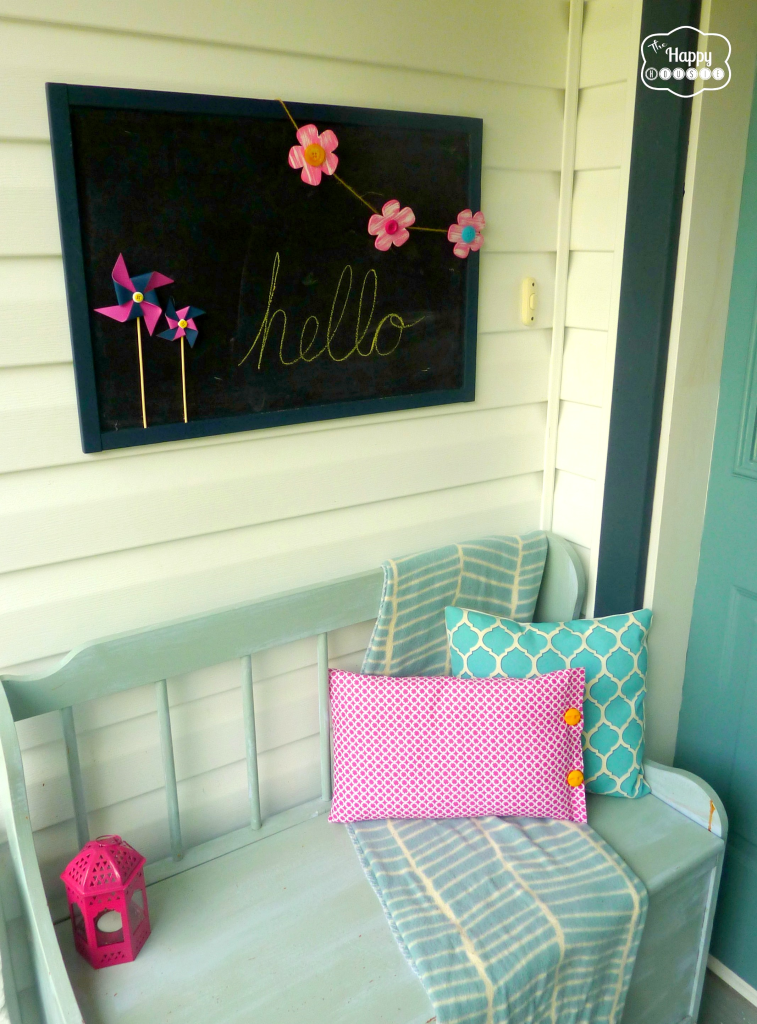
The wooden flowers and pinwheels are part of the wreath on the front door too… stay tuned for that tutorial in a couple of days.
As a little aside, you can probably see where I got the inspiration for my turquoise quatrefoil blog background… I bought the blue fabric right after we moved into the house and have several outdoor pillows plus covered the living room lampshade in it. I still love it and that is pretty remarkable considering I have been living with it for two years now.
What are you doing to add a little life to your front entrance for summer? Any new wreaths? Pillows? Do you like to change things up with the seasons, or keep things pretty simple and classic throughout the year?
Thanks for reading! And remember my housie friends, HOME isn’t built in a day. Enjoy the journey!

This project was featured at!


I may link up at some of these fabulous places below, for more info check out housie parties:
Make the Scene Monday , Monday Funday , Give Me the Goods Monday , Mop It Up Monday , Craft-o-Maniac Monday, Pretty Things, Party in Polka Dots, Project Inspire{d} , Take a Look Tuesday, TCB Get Your Craft On. Tasteful Tuesdays., Share It Link Party, Assets and Efforts, Inspire Me Tuesday, Wow Me Wednesday Whimsy Wednesday , Swing Into Spring Party, From Dream to Reality, The Inspiration Exchange, Fine Craft Guild ,Work it Wednesday , Thursday’s Temptation, Hookin’ Up With House of Hepworth’s, Live Laugh Rowe Live Laugh Linky, Transformation Thursday, Thursdays Are Your Days, Real Family Fun, Pinterest Power Party,, The Weekly Creative , Party Junk, Pinworthy Projects , Weekend Wrap-Up Party, Weekend Bloggy Reading, Strut Your Stuff Saturday, Spotlight Saturday, Get Schooled Saturday, Overflowing With Creativity , Sundae Scoop , Suburbs Mama , That DIY Party


Hi Krista,
I just found your website today and have “liked ” your page on facebook. Your website looks amazing and you have inspired me to actually use the pile of fabric that I have been collecting, but not sure what to do with.
So glad I found you!
Ellis xxxx
This is so practical and looks so nice! Thanks so much for sharing this at Bewitch Me & Titi! You are going to be feature tomorrow!!! yayyy come and link again and grab you featured button!
Hugs
Cami @ TitiCrafty by Camila
Yay Camila!! Thank you!
Great little tute! Love your choice in color!
Thanks Amber… it goes perfectly with the bright pink impatients growing on the porch! They are great in the shade:)
I am a “no sew” kinda girl!! I love my heat bond/steam a seam. I’ve made several pairs of curtains now with it.
I LOVE your porch, btw…and the colors! No surprise! 😉
Pinned! Thanks for sharing on Project Inspired!
Nancy
Thank you Nancy!! Even though sewing a straight line is actually really easy, somehow no-sew feels so much simpler…. and faster. Not sure if it really is!! Thanks again for hosting every week:) Have a fab weekend!
Super tutorial and the pink is such a great addition. Thanks tons for joining Inspire Me. Hugs, Marty
Thank you Marty, the pink was really appealing to me this spring… I think because we had a lot of pink flowers in the garden in that colour – I always am so influenced by the outdoor seasonal colours in my decorating- I am going to share my front door wreath and the rest of the porch soon. You will probably see it at our next party! Thanks again for hosting:)
Krista
I love no sew projects and love your pink pillow. It’s adorable.
Thank you!
Those are so cool! Love that it only takes a fat quarter and that it a no-sew. Win win 🙂
Hi Jessie,
Yes… though you might need two fat quarters for a larger sized pillow form. I think I will try that style next:) Thanks so much for your visit!
Krista
That’s great, so quick. Thanks for sharing.
No problem, Victoria! Thanks for your visit!!
Very cute and a colorful idea.
Super cute project! Love the fabrics! Thanks so much for sharing.
Hope you have a good week!
Hugs from Portugal,
Ana Love Craft
http://www.lovecraft2012.blogspot.com
Hi Ana,
Portugal, wow! So thrilled you came by today! Thanks for your kind comments:)
Krista
Hi! I’m Amyfrom SewsNBows! I came over from the Bewitch Me party. I love the fabrics you chose, and your photos are amazing 🙂
Hi Amy! Thanks… I have had the blue pillow for a couple of summers now but the pink one is new with the fat quarter fabric. I was just thrilled that no-sew worked out because usually I do actually sew my pillows:) So glad you came over!!
You got at NO SEW! 🙂 Your pink lemonade pillow is too pretty! so feminine; perfect for me! 🙂 I love pink but like you with only boys in this house I don’t get to decorate with it much! 🙂 thanks for the tutorial Krista, I might try this and see if I can do it! 🙂
wish you a great weekend too! 🙂
I know, Ingrid… poor us with no pink. Well, now I have added it anyhow!! Of course you can do this – it was soooo easy!
I thought I was doomed to have uninspired pillows because they are expensive and I don’t sew. I will definitely give this a try this summer.
It was so easy! You definitely should give it a try!!
Love this! What a cute pillow and thanks for the great tutorial!
Leslie
Thank you Leslie!!
Love, love, love your porch and colors you have used! These pillows are fabulous 🙂
Sharing on FB tomorrow 🙂
xo, Tanya
twelveOeight
Yay, thank you Tanya!! You made my evening!!
Gawd Krista, you are a genious…PINNING
LOL Christine! Perhaps an overstatement, but thanks for pinning!!
Great tutorial!! I would love it if you would link up at my {Work It Wednesday} linky party!!
xo
amy
http://theblissfulbee.com/work-it-wednesday-linky-party/
Thank you so much for the invite Amy!
Great tutorial. I forwarded it to my sister ( who is not a sewer) because she wanted to make some new pillows for her deck. This is the perfect method for her! Love that mix of pink and aqua on your porch. I get to use pink sparingly inside my house,too, so outside I use it full-throttle! Just finishing up my purple and pink porch and hopefully I’ll have it up on the blog by the weekend.
Just saw you’re a kindergarten teacher , too. How long have you been at it?
Hi Bronwyn!
Thanks so much, hope the tutorial makes sense to her. Think I will try it again soon using two larger/separate pieces of fabric. I was nervous the no-sew wouldn’t be strong enough but, silly me… if you can hem pants with it I am sure it can hold together a little decorative pillow!! Can’t wait to see your porch! I have only taught K this year, primary the past three years, 4/5 before that, 7 before that… teaching for about ten years now minus a couple of maternity leaves. Not 100% – just 80% right now… gives a little extra family time. Pretty cool though, my big boy is in the K class right next door to me this year! Are you a K teacher?? I didn’t know that!!