
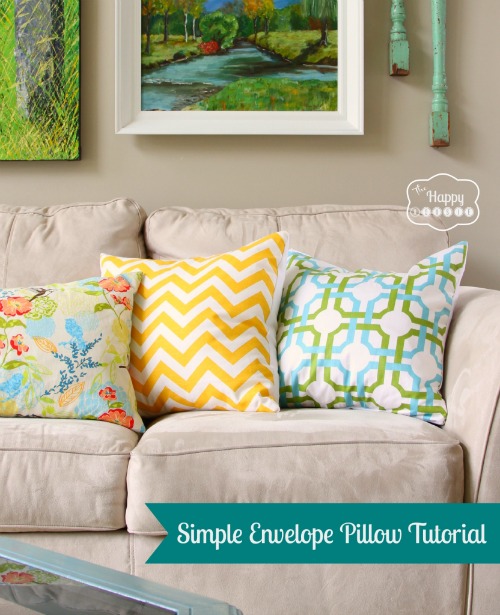
Simple, Speedy, and Stuffed: A Sewing Tutorial for DIY Envelope Pillows
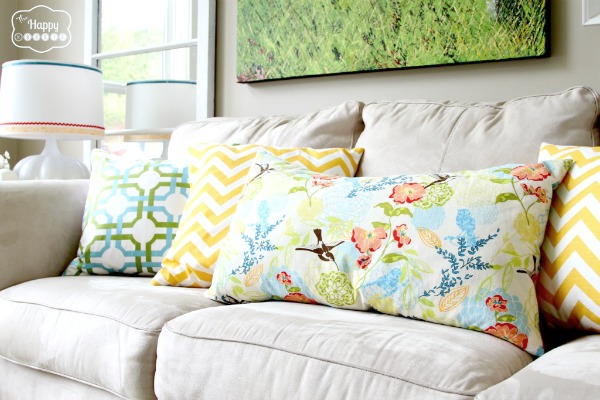
I love changing up our décor for the seasons….and one of the fastest, easiest ways to do that is by changing out our decorative pillow covers.
All you need is fabric and a sewing machine. I won’t even say you need to be able to sew straight lines…mine are never straight and I find pillow covers about the most forgiving sewing project out there.
The other day when I wrote about spring-ifying the living room I promised I would be back with a DIY simple envelope pillow sewing tutorial… and here I am to share with you how I created the simple pillow covers for our living room.
I have used this same method to make mounds of pillows for all over the house as well as for outside, and I promise that once you get the hang of it you will be shocked at how quickly you can whip up several of these babies and change the whole look of your space.
Click here to read the full detailed tutorial…


Thanks for sharing these pillows, that thing is amazing!
I was looking for diy envelope pillows and finally I found it.
So pritty, want it Love how you styled your bench, great colors
I’m so happy that I found this tutorial! My pillows look awesome, my detail oriented hubby is impressed and I’m all ready dreaming of making Christmas pillows!
I’m trying to make my first envelope pillows. Thanks so much Krista for sharing this great tutorial. It really helps me.
Thanks for sharing the DIY arrow pillow as well, that thing is amazing!
thanks for sharing… 🙂
Krista, I don’t know if you’re following my blog still, but I thought I’d let you know about the giveaway I published this morning!
I made mine to the exact size as stated but when I the pillow back gaped because the cushion pushed it out. Should I have made the cover slightly larger? (In the end I was so frustrated, I ended up opening up the cushion, taking out some stuffing and then stitching it closed again!).
Oh no!! I am so sorry to hear of your trouble…I know that I have definitely experienced some serious sewing frustration and it is not fun.. I wonder if your pillow form was really, really full? Or maybe the overlap ended up being a bit too short because of the seaming on the ends? Did it stop gaping once you removed some stuffing? Also, was it polyester fill or a down/feather insert? I find that makes a big difference too- the polyester fill can be less forgiving and doesn’t plump up quite as nicely. I wish I could be of more help!
Thanks for the perfect tutorial! I’ve linked to your tutorial on my website. http://savingupfordisney.com/2014/07/09/diy-cheap-and-easy-pillow-covers-to-brighten-your-home/
Hi, I’m looking for the IKEA pillow forms. I cannot locate them. Can u help me?
Thank you
Christine@ cmsinteriors.com
Hi Christine! I have only ever bought them directly from an Ikea store before so I am not sure whether they are on the Ikea website or not. Is that where you are looking? You can also likely get decent forms from fabric stores if an Ikea is too far away for you. Our closest one is a few hours (and a ferry!) away so we usually save up and do a big shop there every year or two:)
Thank you for the great tutorial. Just finished making my first envelope pillows and they look fabulous! Way easier than I thought it was going to be. Thank you!
I am so glad you had such great success Kristin! I usually find that if there is going to be an issue it is with the sewing machine, and not the actual cushion covers. That part is easy compared to threading bobbins etc:) Hope you love your pillows!
Thank you for such an easy to follow tutorial. I have made three cases so far with plans to do so many more. Wish I could share photos.
Hi Krista – thanks so much for this tutorial! I really, really enjoyed it. The photos were great & it was simple. I actually made 4 pillows for our couch this weekend 😉 I’ve been wanting to work on them for a whole year!
That is such great news Sierra! I think the idea of cushions is always a little overwhelming and once you get going on it, they can actually be super simple!! I am so glad you had such awesome success!!
Great, simple instructions easy to follow. Just made a cushion for my friend’s new baby (she had everything else needed for a baby!). Think I need to buy a rotary cutter and mat now. Thanks Kirsta.
Hi Jo! They are super handy – I use my cutter and mat pretty much every time that I have a sewing project. It is also helps with the fact that I can’t cut a straight line (or sew one for that matter;). So glad you found the tutorial helpful!!
Krista, thank you so much for this tutorial! I learned how to sew when I was a young girl, and that continued through high school. Then, I stopped sewing, and I basically forgot over time how to do a single thing. Now, I’m thinking of buying a sewing machines and learning how to sew pillows, curtains, and that sort of thing, and I feel very overwhelmed. Your tutorial makes me a little more confident! Thanks for that.
Hi Kim! You should definitely do it! I bet it will all come back to you. I have never been a great seamstress but my Mom is and she has taught me the basics- if you can sew straight lines you figure out measurements you can do an amazing amount of your own home décor projects -pillows and curtains included!! Start with easy pillows- that is a great start and will build your confidence. I love my rotary cutter and mat too, it helps me to actually cut straight lines:) The one-piece envelope pillow is the very easiest to start with- I would love to hear about how it turns out!!
Hey Krista,
I just got a used sewing machine to learn on.would you happen to have a beginners pattern, or any ideas. I’d love to learn, but it all seems so daunting. I love your pillows by the way!!
Hi Krista! How exciting- I think the trickiest thing is to get used to using your sewing machine. I would start by practicing setting it all up, loading the bobbin, threading it, etc. and then just practice sewing some straight lines on a scrap of fabric. These pillows, or my one piece envelope pillows – are some of the easiest things you could create. Especially the one piece pillows – they only take you being able to sew four straight lines! Two to hem each of the ends, and then two straight lines to seam them together. I think that is about as basic as you can get! Good luck!!
I made Christmas pillow covers for our family room couch. I am novice seamstress and I made one in less than a half hour and it looks great!
That is awesome news Amy- I am so glad to hear that it was so successful for you – it really is pretty easy, isn’t it (as long as your machine cooperates – I find my machine is always the trickiest part!).
Thank you so much for this page. I had an idea of how the envelope pillow worked but I didn’t know exactly how to cut the fabric. Thanks again for easy to follow directions. One tip that I did change is that I made a 1/4″ hem seam on the opening, I liked the finished look a little better. Have a successful and happy life.
Thank you!! Glad you found some hints and tips that were useful:)
This was so simple. Thanks for sharing measurements, that’s the part I hate! I will use this a lot, thank you!
That exact bird fabric is sold at my local JoAnn’s. I bought some and it is SUPER SHRINKY, as bad as the cheap broadcloth they sell there. So hopefully people will see this and pre-wash, otherwise when you do need to wash your pillow cover it will no longer fit your form!
Hmmmm I ordered mine through an etsy retailer and I didn’t have any problems with shrinkage at all- I have washed my pillows and no issue. It is always a good idea to pre-wash though! I wonder if the product I bought was a higher quality production of the print and that since then they have massed produced it on a cheaper cotton. Could be:) Thanks for your comment and visit!
I love the tutorial on the envelope pillow. I was making my pillow by sewing the forms in. Your way will give me more flexibilty and I don’t have to buy so many extra pillow forms. Now its time for me to practice.
Krista–I had some orphan quilt blocks that I just could not bear to throw away. Thanks to your tutorial, I now have some really awesome “home-y” looking pillows. Thanks!
Hi Sharon! That is fabulous- I love getting to use up old bits and pieces that I love but haven’t been able to – a quilt block pillow cover is a perfect idea!!
What is the seam allowance for this project?
Hi Steff,
That part is a little loosey goosey- I usually cut my pillow cover fabric to the exact size that my pillow inserts are or maybe 1/2 inch larger depending on how much give the fabric has (I would cut it smaller for a stretchier cotton to ensure that the pillow doesn’t look bagged out). Then I use a fairly small seam allowance – probably about 1/4 inch to 1/3 inch – I just follow a line on my machine. That way the covers fit the pillow form super tightly. You could check out my tutorial for one-piece envelope pillow covers for even more information. Hope your project goes really well!
Krista
Hi Krista, I just bought a sewing machine from Amazon (the Brother CS6000i – oh I hope it’s a good one!!!). I’ve never sewed a stitch in my life and my first project is going to be these pillows. Our living room furniture came with pillows that are just plain ugly and I’ve always wanted to make them beautiful. I’m so excited, thanks for the great tutorial!
Hi Christine!
That is sooo exciting!! A new machine – wow! I have an old hand-me-down from my Mom but it fits the bill for now. I hope your pillows turn out amazingly!!
Great tutorial! I just used it to finish a project I had been putting off. Thanks for sharing!
This is a great tutorial! I just used it to complete a project I had been putting off, and it came together perfectly. Thanks for sharing!
Oops! SOrry for the double-comment.
A year later, and I still LOVE this tutorial. For me, the biggest help is the information on sizing. I made a few pillows following this basic idea years ago, but they never fit quite right. You’ve made it about as foolproof as possible.
Thanks again for sharing!
Lisa, I am so thrilled to hear you have had such great success with it- yay! Thanks for coming back to let me know – I really appreciate hearing from you!!
Good tutorial
Just wondering, if you’ve got a flatter pillow (like a chair cushion), will the measurements change?
Hmmm… I don’t think so Natasha. To do an envelope pillow cover for a chair cushion would but a similar process unless it is a thick box cushion? Does your cushion resemble a large square with two or three inch thick sides? Or is it quite thin? A 2-3 inch box cushion might require a different style of pillow, but this method should work for a thin chair cushion.
I think if I were to recover a thin chair cushion I would use the same process. Measure the overall size of the cushion. Add 8 inches at the back for the envelope enclosure to stay together. You could even do it out of one piece of fabric. To do this, let me describe as though your chair cushion measures 18″ wide by 20″ deep. You would cut a piece of fabric that was 18″ wide by 48″ long (20+20+8 for the total length). Hem the two ends. Fold it back on itself until you have the 20″ length on one side and the overlapping ends on the other side (forming a box). Iron the folded ends to keep them a crisp 20″. Pin. Seam up the two open sides and you’re done.
I am going to post on these simple 1 piece cushions soon…wish I already had so I could refer you to some pictures. They are much simpler and I think would work very well for a flattish chair cushion. Hope this helps!
Good luck!
Krista
Thank you so much for this post, it was exactly what I was looking for. And thanks for the ikea filler pillow tip!
Yay Natalie! So glad you found something useful:) The ikea pillows are the best… I always want to stock up whenever I go there. Seems you can never really have enough good pillow inserts:)
I love this. I made two of them in one evening and that included washing that fabric, cutting it out and sewing! Thanks!
Hi Sheri! That is so awesome! I am so glad the project worked out for you… I am always surprised by how quickly they come together too!!
I’m so pleased you found your pillow feature on Friday Finds. Thanks so much for sharing and stopping by. (Grab a featured button from my sidebar, if you’d like.) Have a wonderful weekend! — Laurel
Thanks Laurel!! I will definitely do that – thanks for the return visit too!!
Krista… thanks so much for sharing this project with us… it is FABULOUS! We are featuring it on the blog today!
Take care,
Trish
So thrilled and excited Trish!! Yay!! Thank you!
Hi – just curious if you think this would work for a square cushion for outdoor furniture. I am guessing you would have to add the height of the pillow plus another inch – I am not worried about the corners. I also think I would use the same fabric on all sides – thoughts?
Hi Sarabeth!
Do you mean box cushions? If the foam isn’t too thick then this style could still work for that… I saw the DIY Showoff did her patio swing cushion using an envelope style recently – you could check that out. I would use the same fabric on all sides in this case because then it won’t highlight the corners. Good luck!! Krista
Love the fabric you chose! So fun! Thanks for linking up!
Hi Rita! Thank you!!
Thanks so much for this tutorial. . . have had fabric to redo my couch pillows for YEARS and with your help I was able to make my two accent pillows look brand new in less than an hour!
Hi Michelle!
I am so thrilled that I was able to help you get going on your accent pillows – I often put things off because I think it is going to be a bigger job than it is and am so thrilled when it is easier than I expected. Pillows are definitely one of those things!!
Krista
Great tutorial! I have hesitated making pillow covers because wasn’t sure how to determine what the finished size should be. If I understood correctly, if you are making an18″ pillow you cut you squares to 18″? Do you sew with a small seam allowance? (I don’t own a serger). I am going to make some of these over the holiday weekend! Thanks again for the easy to follow instructions and pictures! Laurie
Hi Laurie! I do make them about the same size, maybe 1/2 inch wider than the finished size and then use about a 1/2 inch maximum seam allowance… I don’t serge anything. This ensures that the pillow fits your form nice and snugly – especially important if you have feather inserts like I do. If you have really filled solid fill inserts so your inserts are really really firm then I would probably cut the pieces 1/2 to 1 inch larger than the finished size so that the actual finished cover will be EXACTLY the size of the pillow (otherwise you might have difficulty coaxing a really really firm pillow form into your cover). Does that make sense?
Krista
This is great and so simple. I am visiting you from Alderberry Hill/Make the Scene Monday. I have pinned this to my Chevrons Pinterest board. See my post on teaching children to sew:
http://www.thelostapron.com/2013/05/summer-sewing-camp-materials.html
Hi Ana,
Thanks for your visit and comments, and pinning!
Krista
Great tutorial. Fun pillows really make a space! Would love to have you come link this up to my party and follow along.
http://alivedinhome.blogspot.com/2013/05/get-social-sunday_18.html
I agree, they do really make the space:) Thanks so much for the invite!
Krista
LOVE the tutorial Krista! You can put it to good use when you make me one! HAHA Kidding 😛 Seriously.. I got to start using my sewing machine!
Thanks so much for sharing this at The DIY Dreamer… From Dream To Reality! I can’t wait to see what you link up tomorrow evening!
Hi Christine! Lol:) I used to find my sewing machine overwhelming but now I know I can conquer that bobbin when it runs out of thread…and I can even get the machine rethreaded! Those are about the extent of my skills, I keep my manual nearby:) Thanks for hosting!
Krista
I love all of them!!! I love pillows and those fabrics are awesome! Thanks for this tute! It’s super easy! It would be so cool if you could join my Link Party on Sundays!
Hope you are having a lovely day
Hugs
Cami @ TitiCrafty by Camila
Hi Camila!!
I will hop over there, thank you for the invitation:)
Krista
great tutorial and love all the colors! I have the bird print as well and use it for my bird cage cover. 🙂
Hi Melissa!
Thank you:) That makes sense as a use for that fabric, bet is looks adorable.
Krista
I love this envelope tut Krista…..thanks so much for sharing and making it easy to understand. Pillows are on my list to make but just can’t seem to find the time. Love your fabric selection too. Just found your site and I love it…going to browse around now.
Thanls again,
Kelly
Hi Kelly!
I often put off my pillows… the fabric and tools will sit ready for days before I finally get down to business. Maybe they seem more overwhelming than other things?? I am glad the tutorial made sense:) You never quite know!
Krista
your pillows are beautiful, bright and cheery! perfect for spring and summer I really like them Krista! 🙂 your space looks so cozy and bright with them! Your tutorial was very good too! I wish I could sew, well I can sew but I’m not good at it! I have attempted many projects and I’m too ashamed of even taking pictures of it! 🙂 even my pillows were a disaster! I hope you are enjoying your weekend Krista! 🙂 btw, I wish I could make my own and go with the colors you choose for yours; too pretty!
Hi Ingrid! Honestly, I don’t know if you could possibly be any worse than me. My lines aren’t straight at all… a good pillow form hides a multitude of sins! Puffs them up nicely despite their internal wonkiness:) Thanks for your super sweet comments:)
Krista
I love the fabrics you chose. I keep seeing that bird one popping up all over. I have had it pinned for a while now. it is just such a happy fabric. I was curious about the green and blue one, though. Could you tell me where you got it? It would be perfect for my craft room.
Hi Laura! The green/blue print is called Groovy Grille, Confetti… it is by Waverly. You can see it one of my favourite online fabric sources, Tonic Living… Groovy Grille. You can likely get it at other online fabric stores as well. It is a fun print… I used white for my cushion backs to save $$… to make two cushion fronts I only needed 1/2 metre of the print. Thanks so much for your visit!
Krista
Love the colors! Way cute.
Thank you Jenn! I am kind of a color fan:)
Krista
I found your pillows on the CSI project… So adorable! I pinned them so all my friends can see this fabulousness also 🙂 … side note… I made my daughter a dress with the bird fabric on your middle pillow. I love that fabric 🙂
Hi Kirstin! That fabric is so adorable… it would be perfect for a little girl’s dress! Thanks so much for pinning!!
Krista
I love the bird fabric – is that the Summersong you were talking about in the earlier comments? I love this tutorial! You should see my envelope tutorial (it’s maybe the first or second blog post I ever wrote?) – it’s pathetic compared to yours! You had rulers and irons… pffft… I was more of a “Let the universe decide what your pillow will look like” crafter.
Either or – love, love, love your pillows. I want them.
Hi Tara! Yes, Summersong. Quilting weight but totally works. I haven’t seen that tutorial, I will have to check it out. Isn’t it funny that even after a few months it is a little embarrassing to look at what you first posted? Quite the learning curve:) If you looked inside my pillows you would see how pathetic and non-straightly sewn they are. hahah no one can tell from the outside:)
Krista
I love the fabrics you used for your pillows- so bright and pretty! I love making pillows, too, and youve inspired me to make some new colorful ones for summer!
Hi Laura!
Thank you so much! So thrilled that you came by to visit and I appreciate your cheery comments!
Krista
Looks like a great way to add some fun and more pillows without spending a fortune! I’m pinning this for the day when I decide to make some pillows. It would be fun and an easy way to change my living room. Thanks so much for linking up at the Real Family Fun link party! Hope to see you next week.
KC
Hi KC! Thanks so much for coming over to comment personally, and thanks again for hosting:) Have a great weekend!
Krista
I’m visiting from the Pinterest Power Party. I love your pillow, great tutorial too. I’m pinning it!
Hi Callie!! Thanks so much for your visit and your kind comments!!
Krista
I love this pillow tutorial! I’m still attempting to learn to sew. I would love it if you would come and link this up at my very first link party
Dandelion Wishes Wednesday. I’m also pinning this 🙂
Hi Ashley! Thank you so much for the invite… I will try to get over to check it out for next week:)
Krista
I have always tried to figure this out on my own to no avail! I am not a whiz at zippers either, so I am always stuck with finished pillows and they are a pain to store! Thanks for the easy and clear tutorial! Going to try this tomorrow with my Sunbrella fabric! 🙂
Hi Kim!! So glad I could be helpful in any way… I would love if you send me a picture of what you make!
Krista
I would love to know where you picked up the floral print for the pillow.
You did a fabulous job.
Hi Hollie!
That print is called Summersong and I bought it from an Etsy seller called Sweet Bobbins… It is actually a quilting weight fabric but works super well for pillows too and you don’t notice the difference in the fabric weight when it is mixed with all my décor weight fabrics.
Krista
Love the pillows Krista! And I just love your style! Thanks so much for sharing on Project Inspired.
Nancy
Thanks Nancy!
Your kind comments made my evening:) Thanks for hosting!!
Krista
I just went shopping for pillows yesterday and came home empty handed. Yours are way cuter than any I have seen in the stores!
Would you mind sharing this on a new link party I host with 5 other blogs: Moonlight & Mason Jars Mondays! We feature 5 blogs who link up every week. The party closes at midnight on Wednesday. I know our readers will LOVE these! 🙂
Xo,
Jenn Pilgrim
The Newlywed Pilgrimage
Hi Jenn,
I think that handmade pillows have a cozieness to them that stiff store bought cushions often lack… though you can get some pretty gorgeous ones in some stores now. My favourite décor store, Home Sense, often has beautiful pillows but for 25-30$ each I could make three or four pillows for the same amount of money! Thanks for inviting me to your party, I will hop over:)
Krista
I have made a ton of pillows – but never an envelope one! It is on my to-do list! Jenna @ Rain on a Tin Roof
Hi Jenna! Can’t wait to see what you create… your stuff is always so beautiful:) Thanks for your visit!
Krista
I have recently become a fan of making envelope pillows. Why I didn’t learn how to do it sooner is beyond me! This is a great tutorial and I think anyone who can make a simple pillow cover can make an envelope pillow with a bonus of being able to remove it and wash it. Happy pillows. 🙂
Hi Sharon! I have always loved the washability factor of envelope pillows… and it seems easier than adding a zipper. Though for my larger pillows I do use zippers. With a big black lab and two little boys we need our cushions to be washable!!
Krista
Great looking pillows! Pinning this!
This is such a great tutorial! I have been tempted just to go buy pillows but I know I can do something like this for half the price of a new pillow. 🙂
I really need to go get some cute fabric and make some of these. I made some stenciled ones for Christmas and they were super simple! I was even lazier and just used one big rectangle and used the salvage edge so I didn’t have to do one hem. lol. Anything to make it faster!
Hi Kelly! I need to try that style…. with the long piece of fabric. I have always cheaped out and done plain backs, but the long rectangle would make it even simpler!
Krista
Great tute! Thank you for sharing at Give Me The Goods!
Dimples & Pig Tales
Hi Amber! Thanks, and thank you for hosting:)
Krista
Great taste in fabric, you! These have been on my to-do list for awhile. Perhaps this is the week!
Thanks Liana!! I would love to see a picture if you do make them!! So thrilled to hear from you… hope life is going well:)
Krista
Thanks for the how-to!!! I have been procrastinating making some new pillows for our living room! I love that these would be so easy to switch out each season! Also, I love that you used the iron-on stuff… Makes me glad to know I’m not the only one who does that! 🙂 I’ve made lots of curtains that way! 🙂
Rachel from FarMorePrecious.com
Hi Rachel!
I am secretly quite an impatient crafter/sewer/diyer so anything that speeds things up and makes it easier is best in my book! Iron on hem is almost as awesome as duct tape!
Krista
Love it, definitely making these! Have shared it on Pinterest too 🙂
Thank you so much Megan! Krista
I am the worse sewer in the world and I admire people who sew, but admire more if they make pretty things such as these! You have to show us a whole living room picture soon Krista!
Hi Vel! I am just about finished…
Krista
Thanks for the tutorial! I have a bunch of covers to make…
thanks for visiting today, too!
Cheers!
No problem Anne! Have a great week, and thanks for your visit too!
Krista
I love the fabrics you used for this project. It looks terrific! I am in the middle of a sewing project like this too. I usually use zippers, but for this one I am going to use the envelope method very similar to what you are showing here 🙂
Hi Katja!
I have used zippers for my larger 24″ square pillows but for some reason I always do envelope backs for my smaller pillows… old habit I guess!
Krista
Krista, I love your fabric choices. And the pillow tutorial is a keeper! 😉
Sadly, I don’t use a sewing machine but I am a big fan of Stichery Witchery. Funny, I know but it works in a pinch.
Just followed you on HomeTalk. I’m into that place.
Hope your Mom’s Day was a good one. Have a great week!
Hi Therese! Nothing wrong with a little fake sewing! I am actually a terrible sewer… I am not lying when I say that my lines aren’t even straight… good thing pillows are puffy and forgiving! I will look for you on Hometalk as well, might already be following you though! Have a fab week:)
Krista
Krista, those pillows are so pretty and just love the fabrics! Ok, definitely need to keep this tutorial to help motivate and inspire me with my new sewing machine! Thanks for sharing and have a great week – am pinning!
Hi Cindy!! Ooooh a new sewing machine – I bet you create a whole lot of fabulousness with that!
Krista